
Posted on January 15, 2005
Now it's time to take it all apart for cleanup and paint.
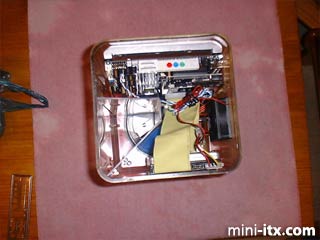
This overhead view shows the addition of the case fan. Note the clearance between the hard drive and Globe created by the spacers, just enough room to make the connections. I painted the motherboard mounting brackets with aluminum paint. It almost gives it the look of having been milled from a billet. Since this started out as a candy vending machine, I felt it should still be functional as one after the little "add-ons" were attached. I fabricated a bin for the candy with plexiglas. The blue piece at the bottom is a plastic funnel. I chose a funnel because it's round shape would completely cover the dispensing/hopper mechanism, and was easier to modify than to fabricate. I made a cutout in the front of the funnel to match up with the bin, making the candy compartment completely sealed. I was having trouble finding the right adhesive to bond the plexiglas and plastic funnel together. I tried several types, but they all failed. So, I resorted to the reliable emergency stand-by, Duct tape. But the standard silver would not look good here. So, I used 3M's latest color, transparent. The blue and white wires came out of the spare-parts box, and are for the Case Power switch. I'm glad I didn't throw that away. I knew I would need it later. Also, only two power cables were routed into the Globe, one for the motherboard and one for the drive. The others were left in the base.
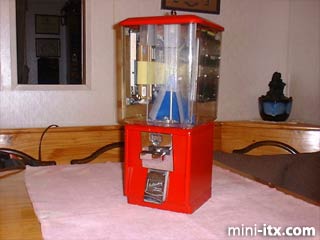
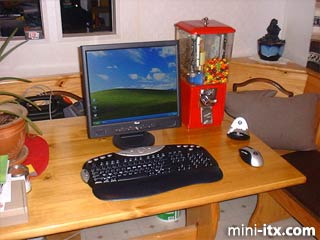
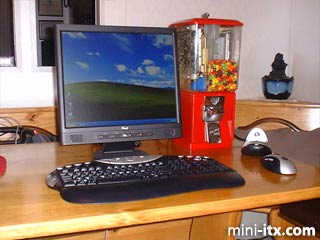
Front view with a new paint job and all components installed
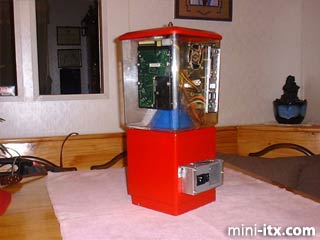
Rear view with a new paint job and all components installed. Note the cutouts for the case fan. I decided to make cutouts that matched the shape of the fan rather than cutting one large hole and then trying to find a nice chrome grill to cover it. Barely visible below the fan is a white square, the power switch. This view also illustrates how the funnel creates the back of the candy bin.
Now, just add the "Skittles." They're just right for when you need that blast of sugar.
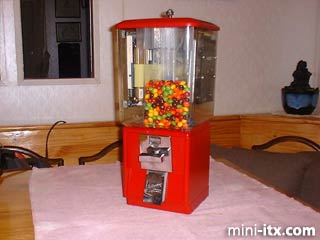
The Gumball PC. Project complete.
Now, you may be thinking, "Wait a minute! Something is missing!"
Gee, I don't know. Unless, it's something like...
Hey! There's no Floppy or CD drive!
Don't need them. I temporarily installed a floppy and CD drive to install the OS, and then removed them. I set the first boot device as the hard drive, and disabled the rest. I attached a LAN line to my hub, and can install any programs from the shared CD drive in my main PC. Besides, I was out of room. I can't get one more thing inside the Globe...
The total build time for this project was just under two weeks, at about 1-2 hours per evening. This includes down time waiting for paint to dry, hanging out at the local watering hole with friends, playing on the weekends and the five weeks (the entire month of November) when suddenly I no longer had "too much time on my hands" due to downsizing at that four-letter place, work.
It's been a fun project, and I hope it will inspire someone else with "too much time on their hands" to see what they can come up with.
 |
 |
 |
Quick Links
Mailing Lists:
Mini-ITX Store
Projects:
Show Random
Accordion-ITX
Aircraft Carrier
Ambulator 1
AMD Case
Ammo Box
Ammo Tux
AmmoLAN
amPC
Animal SNES
Atari 800 ITX
Attache Server
Aunt Hagar's Mini-ITX
Bantam PC
BBC ITX B
Bender PC
Biscuit Tin PC
Blue Plate
BlueBox
BMW PC
Borg Appliance
Briefcase PC
Bubbacomp
C1541 Disk Drive
C64 @ 933MHz
CardboardCube
CAUV 2008
CBM ITX-64
Coelacanth-PC
Cool Cube
Deco Box
Devilcat
DOS Head Unit
Dreamcast PC
E.T.PC
Eden VAX
EdenStation IPX
Encyclomedia
Falcon-ITX
Florian
Frame
FS-RouterSwitch
G4 Cube PC
GasCan PC
Gingerbread
Gramaphone-ITX-HD
GTA-PC
Guitar PC
Guitar Workstation
Gumball PC
Hirschmann
HTPC
HTPC2
Humidor 64
Humidor CL
Humidor II
Humidor M
Humidor PC
Humidor V
I.C.E. Unit
i64XBOX
i-EPIA
iGrill
ITX Helmet
ITX TV
ITX-Laptop
Jeannie
Jukebox ITX
KiSA 444
K'nex ITX
Leela PC
Lego 0933 PC
Legobox
Log Cabin PC
Lunchbox PC
Mac-ITX
Manga Doll
Mantle Radio
Mediabox
Mega-ITX
Micro TV
Mini Falcon
Mini Mesh Box
Mini-Cluster
Mobile-BlackBox
Moo Cow Moo
Mr OMNI
NAS4Free
NESPC
OpenELEC
Osh Kosh
Pet ITX
Pictureframe PC
Playstation 2 PC
Playstation PC
Project NFF
PSU PC
Quiet Cubid
R2D2PC
Racing The Light
RadioSphere
Restomod TV
Robotica 2003
Rundfunker
SaturnPC
S-CUBE
SEGA-ITX
SpaceCase
SpacePanel
Spartan Bluebird
Spider Case
Supra-Server
Teddybear
Telefunken 2003
TERA-ITX
The Clock
ToAsTOr
Tortoise Beetle
Tux Server
Underwood No.5
Waffle Iron PC
Windows XP Box
Wraith SE/30
XBMC-ION