|  | July 15, 2024
KUBIC is a Nintendo-themed, 3D Printable Mini-ITX case September 05, 2017
Choosing the right DC-DC PSU August 27, 2015
AMD's Project Quantum August 13, 2015
The Redstone PC is the ultimate Mini-ITX Minecraft Machine October 09, 2014
The "Restomod TV" April 09, 2013
Installing NAS4Free February 28, 2013
Building an XBMC 12 Home Theatre PC January 25, 2011
XBMC Guide updated to version 10.0 August 06, 2010
Building a Green PC February 15, 2010
Building an ION powered HTPC with XBMC |
| | | | October 10, 2008
The "Cambridge Autonomous Underwater Vehicle 2008" September 12, 2008
"Florian", the DVD burning robot September 05, 2008
The "i-EPIA" May 22, 2008
The "GTA-PC" April 14, 2007
The "Digg" Case January 19, 2007
The "ITX-Laptop" December 07, 2006
The "Tortoise Beetle" October 02, 2006
The "DOS Head Unit" August 31, 2006
The "Janus Project" August 05, 2006
The "Leela PC" June 26, 2006
Nano-ITX in a Football May 17, 2006
The "EPIA Alloy Mod" April 11, 2006
Neatorama's Collection of Case Mods February 18, 2006
The "Rundfunker" October 24, 2005
The "ITX TV" October 06, 2005
The K'nex-ITX August 05, 2005
The "Waffle Iron PC" July 21, 2005
The "Supra-Server" July 18, 2005
The "Mega-ITX" July 07, 2005
The "Encyclomedia" |
| | | | May 25, 2005
The "Accordion ITX" May 16, 2005
The "FileServerRouterSwitch" May 15, 2005
The "Mini Falcon" May 13, 2005
The "Bender PC" May 11, 2005
The "BBC ITX B" May 10, 2005
The "Frame" April 20, 2005
The "Jeannie" March 09, 2005
The "Cool Cube" January 30, 2005
First Nano-ITX Project? January 17, 2005
The "iGrill" January 15, 2005
The "Gumball PC" December 15, 2004
The "Deco Box" December 03, 2004
The "TERA-ITX" October 06, 2004
The "Coealacanth-PC" September 17, 2004
The "Gramaphone-ITX-HD" August 26, 2004
The "C1541 Disk Drive ITX" August 25, 2004
The "SEGA-ITX" August 13, 2004
The "Quiet Cubid" August 06, 2004
The "BMWPC" July 14, 2004
The "Moo Cow Moo" Full alphabetical archive on right hand side of page... |
|
|
"The Log Cabin PC"
By Greg Sowell - Posted on March 3, 2003
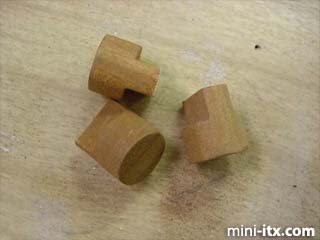
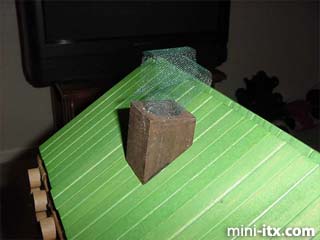
I also used a large log and a cut small log as a beam going across the roof. I needed a center beam to attach the roofing to. All of the small blocks that you see sticking out of the cabin are actually small blocks cut in half. I really have to stop here and thank my cousin Luke for all his help and insight. He single handedly cut all one million small logs in half and hammered the bracket, there by saving the world... Or at least saving me from carpal tunnel syndrome :=) I wanted to cut them in half for two reasons: 1. I needed the inside walls smooth and 2. I didn't have enough of them. My fiancé, Kristi, to whom I will be married to in less than two weeks, always seems to be there helping out huh? She glued in all the little half pieces for me. How many other guys can say their women help them with their hobbies? Only the lucky ones... Now that I'm done with sucking up, I also glued the two chimney pieces together that came with the set. I tried to boar a hole in the center, but ended up tearing it to pieces. I cheated a little and built a new one out of some 2"x4". I wired a red super-bright LED inside the chimney. This chimney is hooked to my HD activity light, in the hopes that it will flicker like a fire. The exhaust from the PSU is ducted out the chimney via a modified funnel attached under said chimney. I also attached some dark-green tulle to the chimney. This tulle waves in the PSU exhaust and really catches the HD light flicker. The roof is solidly attached to one layer of the wall logs. The rest of the logs are all attached to each other, and in turn attached to a quarter inch plywood base. I stained the base and chimney to match. Access to the innards is easily accomplished by lifting the roof from the body of the cabin.
The cut small pieces
Chimney w/tulle
Best wood sculptor anywhere!
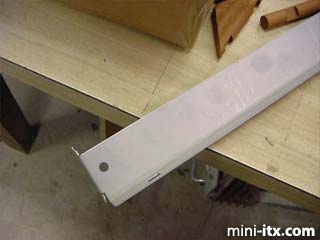
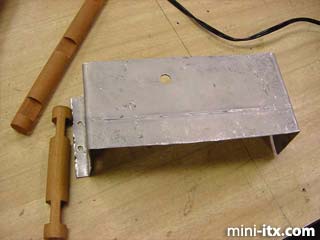
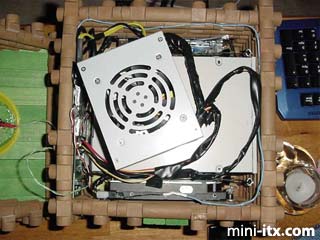
I also had some steel brackets I got from DJ WyattJAM, a buddy of mine. The bracket was hammered and bent into a "C" shape. The ends have small flanges with witch to attach it to the base. It may not look pretty, but it sure does the job! The slot-loading DVD drive sits on the bracket. I chose slot loading on the suggestion of Mr. Perry, yet another friend of mine. A slot loading drive works much like a car CD player; it sucks them in and spits them out. The DVDs feed in between logs. The button lined up perfectly with one of the small logs that go into cabin, so I used a shaved down small log as a button extension. I used some felt like material I had left over from Aunt Hagar's Mini to line the opening in front of the DVD drive... We don't want any scratches on those movies now do we? Like in my last mini, I used a bungee cord to hold the drive snugly against the wall. Then, the PSU sits on top of the drive.
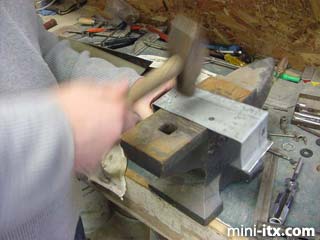
Anger management tool
Managed
Let that anger go!
Shot of the bracket in action
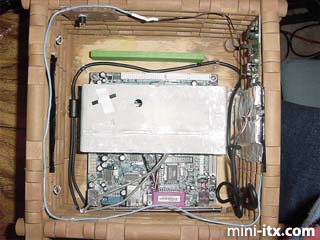
How it all fits
The hard drive lies on its side towards the front of the cabin. I glued an extra roof piece that I had left over next to the HD to hold it into place. I then glued one of the half-small pieces in front of the drive to keep it from sliding.
What a tight...err... cozy fit
Wiring up the cabin, Page 3 --> |
|
|