
Posted on July 6, 2002
Introduction
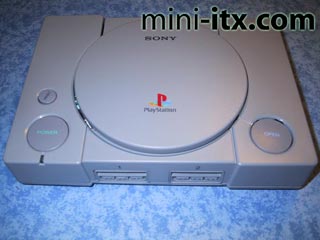
I have built this PC based on VIA's EPIA C3 800 Mhz mainboard. What makes this one so special then? Well, I managed to cram all the components into an old Sony Playstation chassis - and with that I do mean cram! Mainboard, 6GB hard drive, 256MB RAM, 145 Watt PSU, power switch, power connector and an extra fan. Beat that, dude! Here's the story about it, but unfortunately I didn't know of mini-itx.com when I built it so I never recorded any pictures of the process for this article.
|
First of all I gutted the Playstation - removing it's contents, even the CD cover. Then, the good ol' Dremel (there really ought to be a law stating that everyone should own one) went to work. After I had filed out about 50 grams of excess plastic that Sony for some odd reason placed in every thinkable position inside the cover and base I could start fitting the hardware. The EPIA mainboard fits exactly into a Playstation chassis, what luck! Of course I had to remove the gameports - to make them look like real gameports I filed them down until I had a 2.5mm thick frame, then glued the memory flaps into place and fitted the controller pins on black cardboard. Now they really looked like real Playstation gameports. I installed the Ram on the mainboard and tried to fit the cover. Fat chance Buster! It was too high. Dremel, Dremel, Dremel...
|

I carved a 2mm wide gap very close to the outside of the cover. It actually lets light pass through but isn't even visible from the outside. Now the cover fitted - next was the power supply. I used a 145w supply from a company that sold super cheap micro-ATX cases that they had left in stock. The whole case cost me $30 (including postage). Away went the metal cover - now the PSU went into the PlaystationPC. Damn! It was way to big! Even though it only measured 93 by 93 by 34 mm. I thought hard and long... external PSU?? Never! Then I found the solution. If I flipped the PSU upside-down and let it rest on the PCI port of the mainboard, it would actually fit! Dremel again!
|

The power connector and the on/off main switch had to be fitted neatly to the cover. A fan had to be installed too but i skipped the original PSU fan because it was way to big. An ultra silent 40x40mm fan was just the thing I needed. Then I used the on/off switch from the chassis I bought, and fitted it under the real power button on the Playstation cover. To my dismay I just couldn't fit the reset button with a switch because the upside-down PSU didn't leave enough room. The harddrive LED is used by the power indicator in the Playstation chassis though.
|

Then I only had to get a harddrive. My very good and super generous friend Danjel actually saw my project take form and he gave me a 2.5" drive. 6GB for free! [Thanks by the way ;)] I bought a 3.5" to 2.5" IDE converter and took an 80 pin IDE cable, cut one connector off with a pair of scissors, and fitted that into the PlaystationPC too. It was done! One small thing left... I installed Win2K and DivX codecs. Wham! Now this machine sits on my VCR and allows me to play back DivX movies by streaming them through a 100Mbit network. And it works GREAT!
|

What did it cost me? Well if I translate the sums from Swedish Krone to US Dollars it would be...
|
Via Eden Mainboard |
$140 |
That is super cheap for a brand new
machine that can play DivX movies if you live in Sweden. Add
to that the extremely small chassis and the fact it doesn't
look all that bad either and you can see it's money well spent.
I have only one thing to say... do it smaller, man - I double
dare you... ;)
Per
Samuelsson
 |
 |
 |
Quick Links
Mailing Lists:
Mini-ITX Store
Projects:
Show Random
Accordion-ITX
Aircraft Carrier
Ambulator 1
AMD Case
Ammo Box
Ammo Tux
AmmoLAN
amPC
Animal SNES
Atari 800 ITX
Attache Server
Aunt Hagar's Mini-ITX
Bantam PC
BBC ITX B
Bender PC
Biscuit Tin PC
Blue Plate
BlueBox
BMW PC
Borg Appliance
Briefcase PC
Bubbacomp
C1541 Disk Drive
C64 @ 933MHz
CardboardCube
CAUV 2008
CBM ITX-64
Coelacanth-PC
Cool Cube
Deco Box
Devilcat
DOS Head Unit
Dreamcast PC
E.T.PC
Eden VAX
EdenStation IPX
Encyclomedia
Falcon-ITX
Florian
Frame
FS-RouterSwitch
G4 Cube PC
GasCan PC
Gingerbread
Gramaphone-ITX-HD
GTA-PC
Guitar PC
Guitar Workstation
Gumball PC
Hirschmann
HTPC
HTPC2
Humidor 64
Humidor CL
Humidor II
Humidor M
Humidor PC
Humidor V
I.C.E. Unit
i64XBOX
i-EPIA
iGrill
ITX Helmet
ITX TV
ITX-Laptop
Jeannie
Jukebox ITX
KiSA 444
K'nex ITX
Leela PC
Lego 0933 PC
Legobox
Log Cabin PC
Lunchbox PC
Mac-ITX
Manga Doll
Mantle Radio
Mediabox
Mega-ITX
Micro TV
Mini Falcon
Mini Mesh Box
Mini-Cluster
Mobile-BlackBox
Moo Cow Moo
Mr OMNI
NAS4Free
NESPC
OpenELEC
Osh Kosh
Pet ITX
Pictureframe PC
Playstation 2 PC
Playstation PC
Project NFF
PSU PC
Quiet Cubid
R2D2PC
Racing The Light
RadioSphere
Restomod TV
Robotica 2003
Rundfunker
SaturnPC
S-CUBE
SEGA-ITX
SpaceCase
SpacePanel
Spartan Bluebird
Spider Case
Supra-Server
Teddybear
Telefunken 2003
TERA-ITX
The Clock
ToAsTOr
Tortoise Beetle
Tux Server
Underwood No.5
Waffle Iron PC
Windows XP Box
Wraith SE/30
XBMC-ION