
or "Roll-Your-Own" Network Attached Storage Device
Posted on October 4, 2003

Contents
Note: Yes, I know there is another project called TUX Server that deals with adding a http server to the Linux kernel. I'm not trying to ride the coat tails of that project; that's why mine is the T"ux" Server project. Linux is case sensitive and, I hope, you are too.
"Why can't I get to my fscking files?!?," is becoming an often heard cry in homes, apartments, and dorm rooms with an active network when the server is down. Most setups have a central machine (usually the machine with the largest hard drive) that gets turned into a file and/or printer server. If you are like me, however, that system is typically down for hardware/software "upgrades", booting into a different OS, or undergoing occasional troubleshooting after doing a hardware/software "upgrade".
When most people decide to add a Network Attached Storage Device to their network they usually put a handful of IDE hard drives into a spare case with a IDE RAID controller, NIC, memory, and motherboard. Some use Maxtor, some use Western Digital, Seagate, Intel, AMD, etc; but what they all have in common is that it's just another mid-tower beige box. In many situations, that beige box can be an unwelcome addition due to space, power, noise, and other constraints.
Most of us geeks have drooled over the NAS devices from
Maxtor, Quantum, Dell,
and others, but balked at the prices the companies want
for them. Even (relatively new) NAS boxes on Ebay run regularly top $500.00
and you're locked into the manufacturer's hardware and
software. This project was started to give my household a reliable, always-on
file server so that my family can share files while
I'm tinkering around.
While talking it over with my wife, we came up with the following criteria
for the system:
1. Inexpensive Hardware and Software (under $500.00 total was the
goal)
2. Quiet!
3. As small as possible
4. Uses standard, off-the-shelf parts
5. Upgradable (both memory and hard drives)
6. RAID-5 capable
7. 100Mbps full duplex network connection
8. Easy data backup
Locating the hardware for this system was not easy, especially
when you're on a budget. The first decision was what case would be used
to house the NAS. I investigated a number of Flex/Mini ATX cases and
was rather uninspired
by them. After reading through several case-modding sites, I decided I
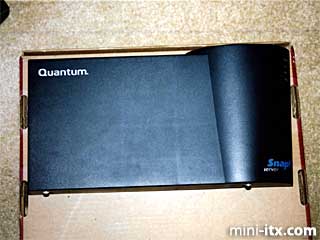
wanted to use a case no one else had. My first break came when I acquired
the empty shell of a Quantum Snap Server 2000 from my friend, Gabriel, at a local
asset recovery company. It has a slight defect (front of the case gaps
a little) and only cost $5.00. Also, I thought that this would be an apropos
case for my project.
The interior dimensions of the case are 176mm width x 340mm length x
66mm height. Not a lot of room to shoehorn in a motherboard, power supply
and drives.
The next item on the my list was the system board since this
is the part that typically takes up most of the real estate in a case (square
mm, that is). Almost a month was spent looking evaluating dozens options
for a system board. Both
MicroATX and FlexATX motherboards were too big. Next, I investigated PC104
type systems but ruled those out as too expensive, too unwieldly, or lacking
PCI slots.
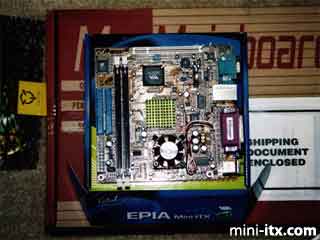
Junking this project crossed my mind until I ran across a reference to a Mini-ITX
form factor while searching on Google. A search for Mini-ITX lead me to
the EPIA 800 and hope that I could pull this off
was restored. At 170mm x 170mm, it is a perfect fit for the Snap Server
case. And with a 800MHz C3 CPU, 2 USB, 10/100 Ethernet, Video, Serial Port,
and PCI slot, it fitted my specifications perfectly.
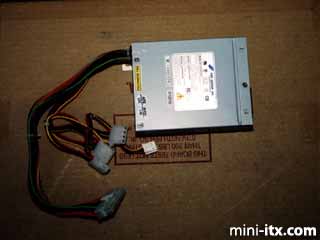
Now for the power supply: I discovered the FSP090-50PL, a 90W FlexATX power supply measuring 100mm wide x 125mm long x 50mm high. This unit is is great for anyone who wants to build a very small system or a case mod system.
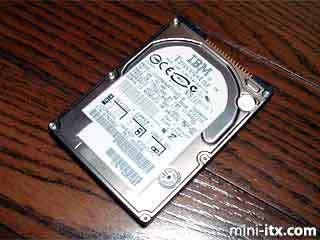
Next came storage. Once again, Gabriel came through. He had just recovered a batch of 10.05GB IBM Travelstar laptop hard drives from a local company and sold them to me for $10.00 each. After carefully straightening many bent pins, a quick spin with IBM's Drive Functionality Test software showed these drives to be in excellent working condition.
At this point, the decision was made to set these up in a RAID-5
array. A quick test fit of parts showed that I could fit 7 of the 10.05GB
drives in the Snap Server case
pretty easily. Unfortunately, ALL of the IDE RAID controllers capable
of supporting RAID-5 arrays were too large to fit in the Snap Server case or
would block the DIMM slots. Redhat Linux 8.0 came to the rescue with the
software-based RAID driver created by
Ingo Molnar.
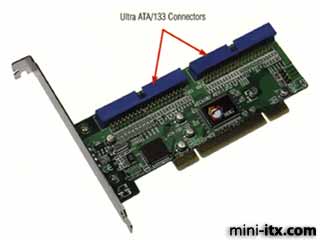
A SIIG Ultra ATA/133 Dual Channel controller (Model CN2487) was purchased for
$40.00 at a local Best Buy to supplement the 2 IDE
channels on the system board. This controller was chosen due to it's very
low profile.
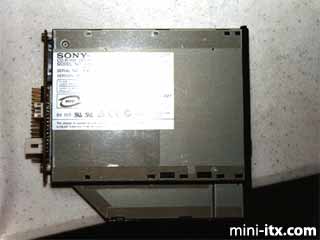
To meet the requirement to backup data and to have a boot device, a Sony CRX700E CD-R/RW drive was purchased from a vendor on E-Bay. In order to connect the drive to the system board, I purchased a Laptop CD-ROM to IDE Adapter (attached to the drive in the picture).
 |
 |
 |
Quick Links
Mailing Lists:
Mini-ITX Store
Projects:
Show Random
Accordion-ITX
Aircraft Carrier
Ambulator 1
AMD Case
Ammo Box
Ammo Tux
AmmoLAN
amPC
Animal SNES
Atari 800 ITX
Attache Server
Aunt Hagar's Mini-ITX
Bantam PC
BBC ITX B
Bender PC
Biscuit Tin PC
Blue Plate
BlueBox
BMW PC
Borg Appliance
Briefcase PC
Bubbacomp
C1541 Disk Drive
C64 @ 933MHz
CardboardCube
CAUV 2008
CBM ITX-64
Coelacanth-PC
Cool Cube
Deco Box
Devilcat
DOS Head Unit
Dreamcast PC
E.T.PC
Eden VAX
EdenStation IPX
Encyclomedia
Falcon-ITX
Florian
Frame
FS-RouterSwitch
G4 Cube PC
GasCan PC
Gingerbread
Gramaphone-ITX-HD
GTA-PC
Guitar PC
Guitar Workstation
Gumball PC
Hirschmann
HTPC
HTPC2
Humidor 64
Humidor CL
Humidor II
Humidor M
Humidor PC
Humidor V
I.C.E. Unit
i64XBOX
i-EPIA
iGrill
ITX Helmet
ITX TV
ITX-Laptop
Jeannie
Jukebox ITX
KiSA 444
K'nex ITX
Leela PC
Lego 0933 PC
Legobox
Log Cabin PC
Lunchbox PC
Mac-ITX
Manga Doll
Mantle Radio
Mediabox
Mega-ITX
Micro TV
Mini Falcon
Mini Mesh Box
Mini-Cluster
Mobile-BlackBox
Moo Cow Moo
Mr OMNI
NAS4Free
NESPC
OpenELEC
Osh Kosh
Pet ITX
Pictureframe PC
Playstation 2 PC
Playstation PC
Project NFF
PSU PC
Quiet Cubid
R2D2PC
Racing The Light
RadioSphere
Restomod TV
Robotica 2003
Rundfunker
SaturnPC
S-CUBE
SEGA-ITX
SpaceCase
SpacePanel
Spartan Bluebird
Spider Case
Supra-Server
Teddybear
Telefunken 2003
TERA-ITX
The Clock
ToAsTOr
Tortoise Beetle
Tux Server
Underwood No.5
Waffle Iron PC
Windows XP Box
Wraith SE/30
XBMC-ION