|  | July 15, 2024
KUBIC is a Nintendo-themed, 3D Printable Mini-ITX case September 05, 2017
Choosing the right DC-DC PSU August 27, 2015
AMD's Project Quantum August 13, 2015
The Redstone PC is the ultimate Mini-ITX Minecraft Machine October 09, 2014
The "Restomod TV" April 09, 2013
Installing NAS4Free February 28, 2013
Building an XBMC 12 Home Theatre PC January 25, 2011
XBMC Guide updated to version 10.0 August 06, 2010
Building a Green PC February 15, 2010
Building an ION powered HTPC with XBMC |
| | | | October 10, 2008
The "Cambridge Autonomous Underwater Vehicle 2008" September 12, 2008
"Florian", the DVD burning robot September 05, 2008
The "i-EPIA" May 22, 2008
The "GTA-PC" April 14, 2007
The "Digg" Case January 19, 2007
The "ITX-Laptop" December 07, 2006
The "Tortoise Beetle" October 02, 2006
The "DOS Head Unit" August 31, 2006
The "Janus Project" August 05, 2006
The "Leela PC" June 26, 2006
Nano-ITX in a Football May 17, 2006
The "EPIA Alloy Mod" April 11, 2006
Neatorama's Collection of Case Mods February 18, 2006
The "Rundfunker" October 24, 2005
The "ITX TV" October 06, 2005
The K'nex-ITX August 05, 2005
The "Waffle Iron PC" July 21, 2005
The "Supra-Server" July 18, 2005
The "Mega-ITX" July 07, 2005
The "Encyclomedia" |
| | | | May 25, 2005
The "Accordion ITX" May 16, 2005
The "FileServerRouterSwitch" May 15, 2005
The "Mini Falcon" May 13, 2005
The "Bender PC" May 11, 2005
The "BBC ITX B" May 10, 2005
The "Frame" April 20, 2005
The "Jeannie" March 09, 2005
The "Cool Cube" January 30, 2005
First Nano-ITX Project? January 17, 2005
The "iGrill" January 15, 2005
The "Gumball PC" December 15, 2004
The "Deco Box" December 03, 2004
The "TERA-ITX" October 06, 2004
The "Coealacanth-PC" September 17, 2004
The "Gramaphone-ITX-HD" August 26, 2004
The "C1541 Disk Drive ITX" August 25, 2004
The "SEGA-ITX" August 13, 2004
The "Quiet Cubid" August 06, 2004
The "BMWPC" July 14, 2004
The "Moo Cow Moo" Full alphabetical archive on right hand side of page... |
|
|
Scythe e-Otonashi Review
Inspection
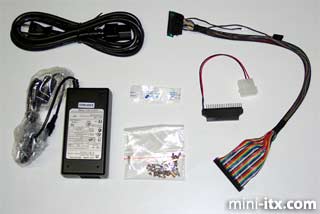
The e-Otonashi arrived from the manufacturer very well packaged. Included was the case itself, a fanless 60W power supply, some thermal compound, all necessary screws, and two IDE cables. One cable is suited for small, laptop sized, hard drives. The other will work with slim (i.e., laptop) CD or DVD drives. All the included parts are shown below:
Having these specialized cables included with the case is a big plus in my view. Even though the EPIA M comes with standard IDE cables, you need to purchase adapters to connect them to these smaller components, and the adapters can run you around $15-$20 each, sometimes more when you factor in tax and shipping.
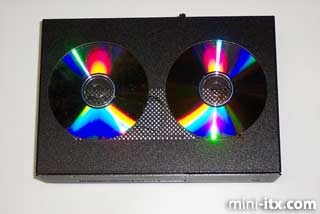
The case appears very well made and seems more sturdy than my Morex 2688. To give you an idea of its size, here it is with some CD's on it.
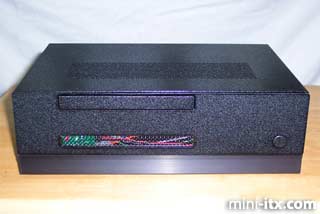
Like the Morex case, this one has a rather "minimalist" appearance, which I really like. You don't want your set top box to dominate the room.
The front panel has a power switch, and a recessed reset button that you need an unfolded paper clip to press. It also has a slot for a slim CD or DVD ROM drive. Below that is a vent that you normally can't see through so easily but the camera flash highlights the parts inside. Behind the vent on the left are a green and a red LED. The green is for power, and the red is for disk activity. See below.
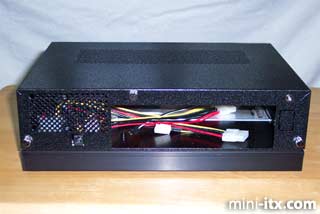
The back of the case is shown below. Not much to say about it; it has a place for the EPIA connector panel and a plug for the 12V 60W power supply. Note the vent on the left side. No fan!
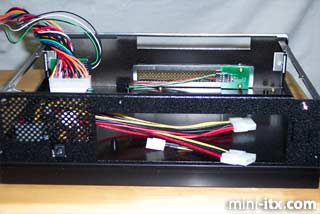
The top of the case is easily removed by removing the three thumbscrews on the back (which you can see in the picture) and then sliding the top backwords a bit.
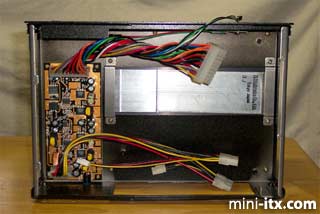
Shown below is the inside of the case, with the hard drive/CD support platter removed. You can see the power supply on the left which has a power cable that is just the right length for the EPIA M. You also have two large and two small component power connectors. Also notice the Heatlane heatpipe on the bottom of the case.
I built an infrared receiver and place it inside the case behind the vent on the front of the case. Below is a shot of that vent as seen from the inside of the case. There wasn't any convenient place to attach an IR receiver circuit so I ended up using foam tape to secure it to the inside front of the case.
Next: Assembly -->
|
|