
Posted on January 15, 2005
Introduction
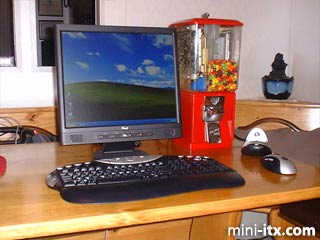
Our I.T. Guru came into my office the other day and said, "Hey, check this out!" as he commandeered my PC and brought up Mini-ITX.com. After viewing a number of the projects, he suggested that I needed to build something to submit. I suggested that he do it instead. Then, he pointed out that I'm the one with too much time on my hands. Since he was right, I started thinking about what could I build that hasn't been done. As I was staring out my office window, an idea hit me. I have three gumball vending machines on the windowsill and the "Skittles" machine sales have not done well. (I collect gumball machines of various vintages and clean them up for display, and the occasional candy fix.) Now that I had a start, I began a list of the components I would need. At the time, all I had was a Gumball machine, a spare 10 Gb Western Digital hard drive and the usual stuff everyone has in the "I-can't-throw-this-away-I-might-need-it-later" spare parts box. So, the list was easy to complete, I needed everything.
I took the Gumball machine home, got online and started shopping. But, where to start. In the background one of those William Shatner/Leonard Nimoy commercials was on the TV. I heard Shatner's voice and heard "Captain Kirk" saying, "Power Scotty! I need power!" OK! Let's start with a power supply. My choice was based more upon dimensions than output. I found a 250W supply that was 5" deep x 3" wide x 2.5" high. Next, I had to "Put it on the viewer, Lt. Uhura." A nice 17" flat-panel LCD would be great. I haven't heard of "Rosewill" monitors, but the price was right. And, since I was boldly going where I haven't gone before, nothing short of a cordless keyboard and optical mouse would do. (Ok, Ok. No more "Star Trek".) The "Logitech" Cordless MX Duo fit the bill perfectly. Oh Yeah! And, the thing that started this in the first place, the MII-10000 Nehemiah 1Ghz. Within a few days, everything was delivered. Now all I have to do is put it together. The easy part, right?
Construction
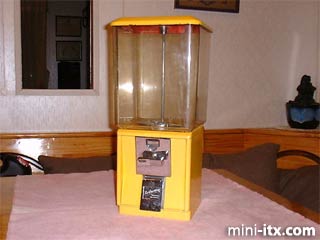
First, the case. This is a "Northwestern" vending machine from the front...
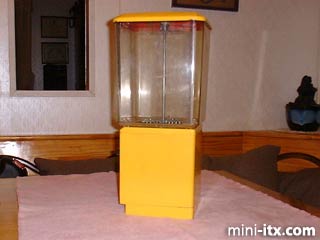
From the back...
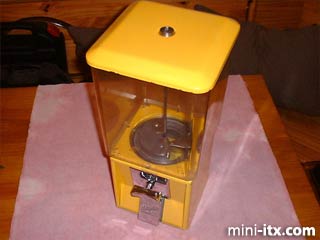
And, from the top.
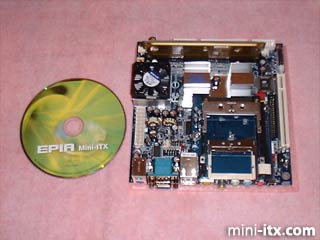
The Nehemiah 1Ghz with 1Gb RAM.
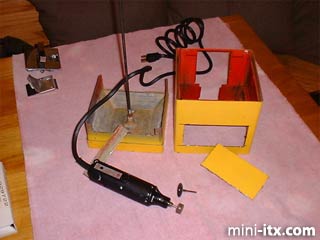
The smallest power supply I could find was still too deep to fit entirely inside the case. Using my Dremel with a metal-cutting disk, I cut out an opening that would allow the power supply to expose a little over an inch outside the case. Cleaned up the sharp edges with a grindstone.
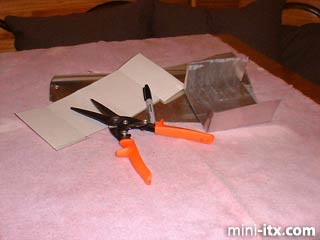
Next, I had to fabricate a mounting device for the power supply. I made a template from posterboard. I added an extra inch to the middle of the bottom in order to make a "Z" fold. This "Z" fold creates strength by adding two additional layers of material across the one-inch fold. Then, I traced the template on some tin, used tin-snips to cut it out and folded it into shape.
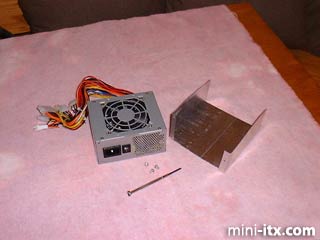
The mounting bracket complete, holes were drilled to attach the power supply.
 |
 |
 |
Quick Links
Mailing Lists:
Mini-ITX Store
Projects:
Show Random
Accordion-ITX
Aircraft Carrier
Ambulator 1
AMD Case
Ammo Box
Ammo Tux
AmmoLAN
amPC
Animal SNES
Atari 800 ITX
Attache Server
Aunt Hagar's Mini-ITX
Bantam PC
BBC ITX B
Bender PC
Biscuit Tin PC
Blue Plate
BlueBox
BMW PC
Borg Appliance
Briefcase PC
Bubbacomp
C1541 Disk Drive
C64 @ 933MHz
CardboardCube
CAUV 2008
CBM ITX-64
Coelacanth-PC
Cool Cube
Deco Box
Devilcat
DOS Head Unit
Dreamcast PC
E.T.PC
Eden VAX
EdenStation IPX
Encyclomedia
Falcon-ITX
Florian
Frame
FS-RouterSwitch
G4 Cube PC
GasCan PC
Gingerbread
Gramaphone-ITX-HD
GTA-PC
Guitar PC
Guitar Workstation
Gumball PC
Hirschmann
HTPC
HTPC2
Humidor 64
Humidor CL
Humidor II
Humidor M
Humidor PC
Humidor V
I.C.E. Unit
i64XBOX
i-EPIA
iGrill
ITX Helmet
ITX TV
ITX-Laptop
Jeannie
Jukebox ITX
KiSA 444
K'nex ITX
Leela PC
Lego 0933 PC
Legobox
Log Cabin PC
Lunchbox PC
Mac-ITX
Manga Doll
Mantle Radio
Mediabox
Mega-ITX
Micro TV
Mini Falcon
Mini Mesh Box
Mini-Cluster
Mobile-BlackBox
Moo Cow Moo
Mr OMNI
NAS4Free
NESPC
OpenELEC
Osh Kosh
Pet ITX
Pictureframe PC
Playstation 2 PC
Playstation PC
Project NFF
PSU PC
Quiet Cubid
R2D2PC
Racing The Light
RadioSphere
Restomod TV
Robotica 2003
Rundfunker
SaturnPC
S-CUBE
SEGA-ITX
SpaceCase
SpacePanel
Spartan Bluebird
Spider Case
Supra-Server
Teddybear
Telefunken 2003
TERA-ITX
The Clock
ToAsTOr
Tortoise Beetle
Tux Server
Underwood No.5
Waffle Iron PC
Windows XP Box
Wraith SE/30
XBMC-ION