
Posted on May 22nd, 2008
Introduction
Normally I don't see the point in buying limited/special editions of computer games as they come with items that you will find yourself throwing away after a while. But not pre-ordering my GTA IV early enough meant I had to order the special edition. I'm glad that I did. It came delivered in a normal cardboard sleeve but inside all the extras were packaged inside a safety deposit type box.
During a quiet period at work, with no stealing cars or gunning down innocent folks because they gave me a dodgy look, I had been playing with different operating systems on a Mini-ITX system. As one does, I took it apart and admired the size of it, or lack of. During a conversation about the versatility of the Mini-ITX breed and how they could perform as a HTPC yet look ugly in the off the shelf cases, the following dawned on me.
Enter The Box
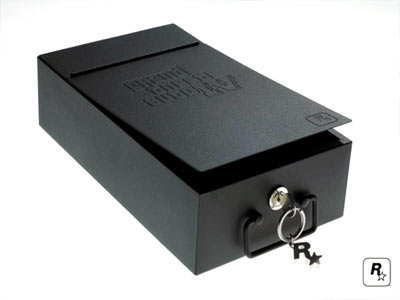
This time around I would not be throwing the specials away or searching for the best selling price on e-bay. The box measures 18cms wide and the motherboard measures 1cm less. It was a match made in gangster heaven..
The Idea
I'm not a very creative person and would rather fix a problem with some VB Code then a drill but this just seemed like a great idea. The box was just wide enough and it was long which meant that I should easily be able to fit the rest of the 'bits' inside.
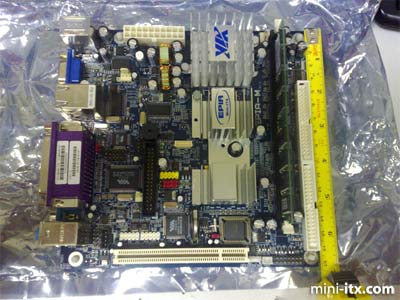
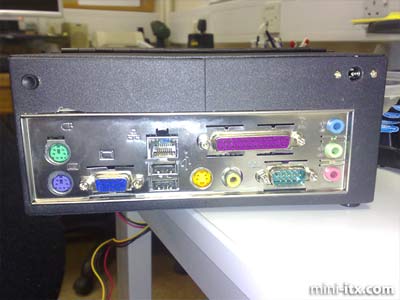
The donor PC. As you can see - apart from the fans - there are no moving parts with this PC so noise isn't a concern. The OS (so far I have chosen Slax) runs straight from the 1GB CF card connected to the IDE controller with a Compact Flash Adapter. Having no internal hard drive meant that I could be generous with the spacing of components.
Enlisting
As I am useless with a drill and precision measuring I enlisted the help of a man with great skill and buckets of tools. To whom I do thank. Who cut out the back of the box to mount the motherboard plate (amongst other bits). This meant that the motherboard could be upgraded as and when required.
With the motherboard in place and fitting so comfortably I wondered if this box had been engineered for this purpose.
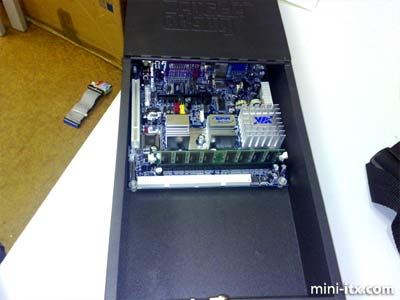
The motherboard was secured with risers that were screwed in from underneath.
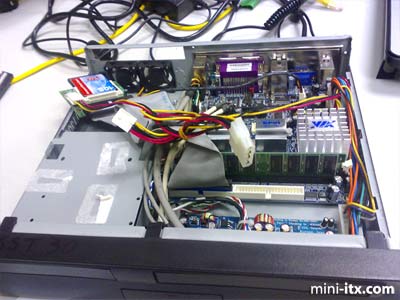
The Rest
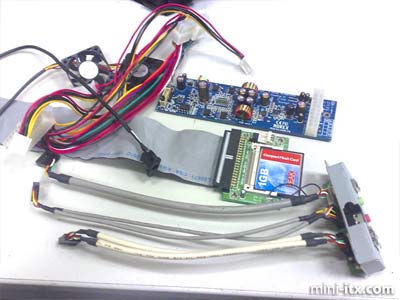
To arrange the rest of the components into the box it was a case of suck it and see, and drilling a couple more holes to mount the power circuit board. The front headers I was a bit wary to include but as a friend pointed out to me they were part of the original system so I had to include them.
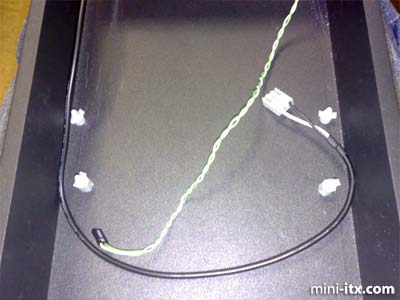
I went back to the man with the 'skills n drills' and we found a good place to mount it (as of cable length) and also decided to cut out an exhaust hole for the fan. The fans are next to silent and as the case doesn't really have any ventilation I thought it best to mount one on the CPU heat sink and the other as an exhaust fan.
Switches & Power
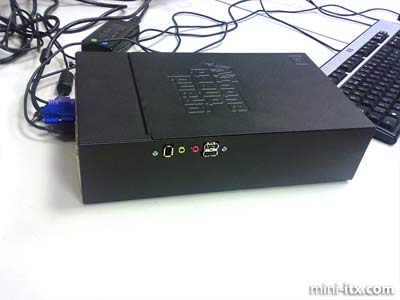
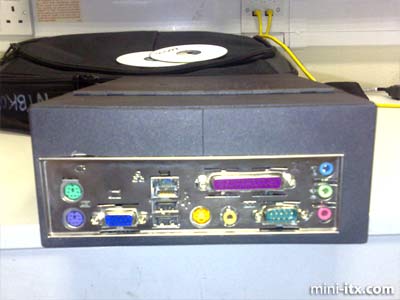
A power switch would be a good idea (also was almost forgotten about) and as the PC uses an external power supply connector we mounted them both on the back above the motherboard plate.
Frontal Assault
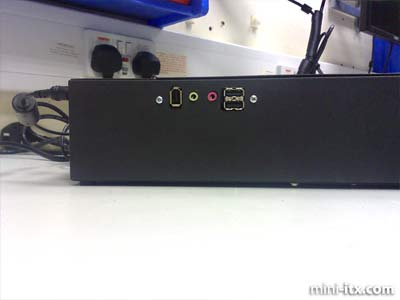
One of the more awkward things in this project was fitting the front ports for USB and such like. This turned out to be a side mount as I didn't really want to destroy the front of the case (and the cables didn't reach without an unwanted stretch).
 |
 |
 |
Quick Links
Mailing Lists:
Mini-ITX Store
Projects:
Show Random
Accordion-ITX
Aircraft Carrier
Ambulator 1
AMD Case
Ammo Box
Ammo Tux
AmmoLAN
amPC
Animal SNES
Atari 800 ITX
Attache Server
Aunt Hagar's Mini-ITX
Bantam PC
BBC ITX B
Bender PC
Biscuit Tin PC
Blue Plate
BlueBox
BMW PC
Borg Appliance
Briefcase PC
Bubbacomp
C1541 Disk Drive
C64 @ 933MHz
CardboardCube
CAUV 2008
CBM ITX-64
Coelacanth-PC
Cool Cube
Deco Box
Devilcat
DOS Head Unit
Dreamcast PC
E.T.PC
Eden VAX
EdenStation IPX
Encyclomedia
Falcon-ITX
Florian
Frame
FS-RouterSwitch
G4 Cube PC
GasCan PC
Gingerbread
Gramaphone-ITX-HD
GTA-PC
Guitar PC
Guitar Workstation
Gumball PC
Hirschmann
HTPC
HTPC2
Humidor 64
Humidor CL
Humidor II
Humidor M
Humidor PC
Humidor V
I.C.E. Unit
i64XBOX
i-EPIA
iGrill
ITX Helmet
ITX TV
ITX-Laptop
Jeannie
Jukebox ITX
KiSA 444
K'nex ITX
Leela PC
Lego 0933 PC
Legobox
Log Cabin PC
Lunchbox PC
Mac-ITX
Manga Doll
Mantle Radio
Mediabox
Mega-ITX
Micro TV
Mini Falcon
Mini Mesh Box
Mini-Cluster
Mobile-BlackBox
Moo Cow Moo
Mr OMNI
NAS4Free
NESPC
OpenELEC
Osh Kosh
Pet ITX
Pictureframe PC
Playstation 2 PC
Playstation PC
Project NFF
PSU PC
Quiet Cubid
R2D2PC
Racing The Light
RadioSphere
Restomod TV
Robotica 2003
Rundfunker
SaturnPC
S-CUBE
SEGA-ITX
SpaceCase
SpacePanel
Spartan Bluebird
Spider Case
Supra-Server
Teddybear
Telefunken 2003
TERA-ITX
The Clock
ToAsTOr
Tortoise Beetle
Tux Server
Underwood No.5
Waffle Iron PC
Windows XP Box
Wraith SE/30
XBMC-ION