
Posted on January 31, 2003
Introduction
"Greg, can you build Hagar a computer?" I said, "Sure, what you want in it?" "You just build it and we will pay you whatever it cost you." Wow, that might be something that you don’t want to say to me. :) So first off this project has limited desk space. Secondly, this computer was built to be cost effective, so I will throw in the prices for you. Mini-ITX ($120.00) to the rescue, and I also wanted to build a mini system. I was then thinking to myself "What can I put it in?" This led me to Hobby Lobby, my local craft store. I began to look for a suitable "box" that would house my system. To aid in the female look of the box I brought along my fiancé Kristi. I found just the right one and got it okayed by the boss. It was regularly $25.00, but I got it for half price ($12.00). I must say that some of my methods may seem somewhat unorthodox, but I assure you that the strength and structure of the final install is sound.
Calm before the storm 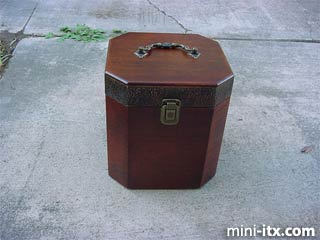
Let's do it!
First, I stuck everything inside the box and tried to see how I would mount it. I first decided that I wanted the DVD drive ($40.00) to eject straight up, but after Kristi reminded me how CDs can fall inside, I realized I needed to change that. I knew that I was going to put a "lid" inside the box to cover all the computer components, so Kristi suggested I set it on top of the lid. What would I do without her help? Besides having CDs stuck in the DVD drive, I would be wearing dirty clothes and be malnourished. LOL. Now that I had the general design down, I moved on to cutting out the holes for the Mobo connecters.
Before I begin marking where to cut I need to know just where to position the template. I want some ventilation in this thing so I drilled holes in the bottom to be the air intake. This also allows me to see how thick the bottom wood is. After digging through some boxes I found the metal back cover plate thing. I covered the back in the general area where I was going to be cutting with scotch tape ($.75). I know that most people would probably use masking tape, and I suppose there is nothing wrong with that. I just prefer to see my working surface while I cut it. I did a little measuring and traced the connecters onto the tape. Time for a little cutting.
Templated 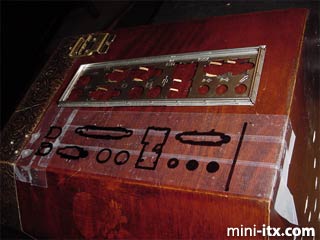
I’m sure you all know how to use a Dremel and a jigsaw so I will save you the time. I did a little modding to the power supply unit (PSU - $30.00) to get it ready. Everything that protrudes out of the back of the PSU is going to add time and work, so I decided to save myself a little of both. This PSU had an on/off switch as well as the voltage switch that were in the way. I must say here that I take no responsibility for what you do. I recommend not opening a PSU. It is dangerous and can seriously harm you. Having said that, I opened my PSU. I cut the wires going to the on/off switch and spliced them together. Bye bye switch. I then took out the screws for the voltage selector and wrapped it in electrical tape. After I shoved the voltage switch back inside, I closed the PSU back up. I next made a template of my PSU. I used a cereal box ($2.50 man this stuff ain't cheap) just like I always do. If I were you, I would save this template, because full size PSU’s have a pretty standardized size and shape. I then used the template to cut the box in the same manner as with the Mobo connecters. Now, how to hold down the accessories?
Now you see them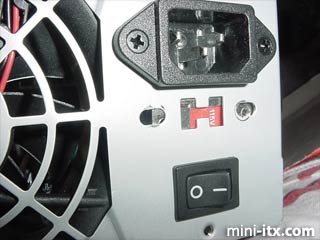
Now you don't 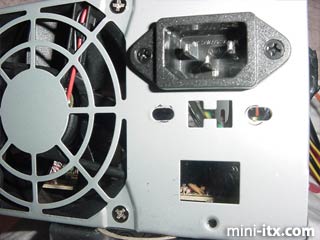
This may look ghetto to you, but it will never be seen and it does a tremendous job! To secure the floppy drive ($35.00), hard drive (My old HD $30.00), and power supply I used little bungee cords (4 for $1.79). I took screw eyes (20 for $.89) and attached them on either side of the object. I then fastened the bungee to one side and hooked it to the other side. The power supply required two bungee cords going from side to side as well as top to bottom. The floppy drive set some distance from the bottom of the box so I made a bracket of sorts out of a Halloween candy dish ($.79). The bracket screwed (tiny screws $1.00) into the box, and the floppy drive sat on top if it.
See the bracket at the bottom? 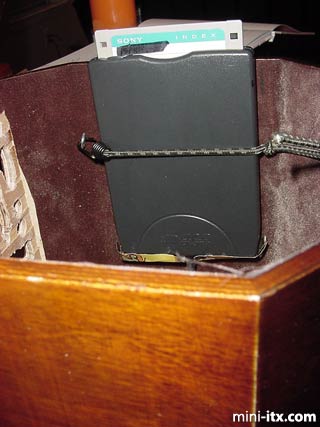
The motherboard required further support, so I decided to build a bracket. I went to the local hardware store and picked up a shelf bracket (less than $2.00). The bracket is about 12" long and is straight and flat. I am living in some apartments now, I had to move away from home for a job, so I don’t have access to all the tools I used to. Anyway, while I was at the hardware store I went to their tool corral where they keep their vices. I stuck my bracket into a vice and bent it to my desired length (borrowing their tools, free :)). When I got home I trimmed it, then used the Mobo as a template to tell me where to drill my screw holes. I don’t have a tap and die set here, so I drilled the holes too large, and used epoxy to keep the Mobo screws in. Once I was done with that I dry fitted it.
Motherboard bracket 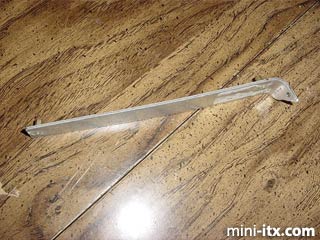
 |
 |
 |
Quick Links
Mailing Lists:
Mini-ITX Store
Projects:
Show Random
Accordion-ITX
Aircraft Carrier
Ambulator 1
AMD Case
Ammo Box
Ammo Tux
AmmoLAN
amPC
Animal SNES
Atari 800 ITX
Attache Server
Aunt Hagar's Mini-ITX
Bantam PC
BBC ITX B
Bender PC
Biscuit Tin PC
Blue Plate
BlueBox
BMW PC
Borg Appliance
Briefcase PC
Bubbacomp
C1541 Disk Drive
C64 @ 933MHz
CardboardCube
CAUV 2008
CBM ITX-64
Coelacanth-PC
Cool Cube
Deco Box
Devilcat
DOS Head Unit
Dreamcast PC
E.T.PC
Eden VAX
EdenStation IPX
Encyclomedia
Falcon-ITX
Florian
Frame
FS-RouterSwitch
G4 Cube PC
GasCan PC
Gingerbread
Gramaphone-ITX-HD
GTA-PC
Guitar PC
Guitar Workstation
Gumball PC
Hirschmann
HTPC
HTPC2
Humidor 64
Humidor CL
Humidor II
Humidor M
Humidor PC
Humidor V
I.C.E. Unit
i64XBOX
i-EPIA
iGrill
ITX Helmet
ITX TV
ITX-Laptop
Jeannie
Jukebox ITX
KiSA 444
K'nex ITX
Leela PC
Lego 0933 PC
Legobox
Log Cabin PC
Lunchbox PC
Mac-ITX
Manga Doll
Mantle Radio
Mediabox
Mega-ITX
Micro TV
Mini Falcon
Mini Mesh Box
Mini-Cluster
Mobile-BlackBox
Moo Cow Moo
Mr OMNI
NAS4Free
NESPC
OpenELEC
Osh Kosh
Pet ITX
Pictureframe PC
Playstation 2 PC
Playstation PC
Project NFF
PSU PC
Quiet Cubid
R2D2PC
Racing The Light
RadioSphere
Restomod TV
Robotica 2003
Rundfunker
SaturnPC
S-CUBE
SEGA-ITX
SpaceCase
SpacePanel
Spartan Bluebird
Spider Case
Supra-Server
Teddybear
Telefunken 2003
TERA-ITX
The Clock
ToAsTOr
Tortoise Beetle
Tux Server
Underwood No.5
Waffle Iron PC
Windows XP Box
Wraith SE/30
XBMC-ION