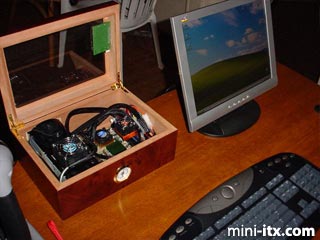
The "Humidor II"
Style and elegance has
never been used to describe a computer until now. Desktop
humidors have been gracing the desks of the worlds most ambitious
and successful for generations. Regardless of your thoughts
on smoking, the wooden decorative box is a hit on any desk.
Thousand dollar French humidors, Chippendale, original pre-embargo
Cuban-made and the such. I think it's possible to re-make
one of these beautiful boxes into a stylish and elegant office
tool. They were originally designed to occupy desk space and
make a statement about the owners' life-style and aloof-ness.
They still can.
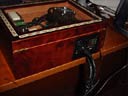
This glasstop variety
is an exercise in the excess that is case modding. Solid tops
can come with a key so it won't accidentally expose it's raw
tech. How many people out there see three suits with their
hands behind their back peering down into the glowing abyss?
Enjoy!
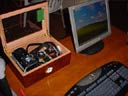
Posing in our
"go to work attire". Opportunity to quote amazing
details:
- 12 Volt DC motors (3)
- 2 ft of 1/4" cable mesh
- 1 1/2 ft of 1/2" cable mesh
- 40mm finger guard (chrome)
- 60mm finger guard (chrome)
- And lots of other gruesome details.
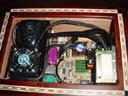
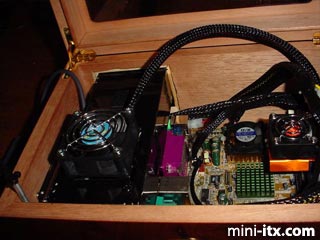
Posing with our
skirt over our head. The small green circuit board attached
to the lid are the guts of an Orinoco USB Silver Client. Yes,
802.11b shooting through the glass-top. I installed the Windows
XP Pro software with the wireless hardware attached. After
the install, the equipment was working perfectly with my home
WLAN. The aromatic scent of Spanish cedar hits the senses
as the lid is opened.
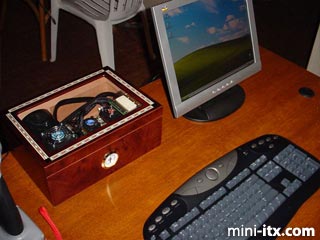
Close-up of Vantec
ThermoFlow. Serious overkill, but I like it. The speed of
the fan is automatically controlled by temperature sensor
on the outlet side of the fan. It is working as an extraction
fan. I mounted the fan inside out by attaching the fan to
the outside of the mounting bracket on the PSU. The original
fan was much thinner and mounted inside the PSU. Got a chance
to play with cable mesh including the Velcro variety. I like
the look as opposed to those brightly colored candy twists
you see in most case mods.
Nice inside shot showing the Logitech wireless base station
removed from on top of the PSU. Velcro of course. First step
in the PSU removal sequence.