
Posted on Jan 19th, 2006
The Keyboard Surround
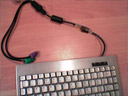
The keyboard that I bought came with an integrated mouse. It was a little more expensive than the USB wireless version, however I prefer a PS2 connection as it always works. Working with Aluminium was important as I felt if I made the case totally of Aluminium, then it would reduce heat build up better than a steel case.
 |
 |
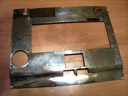 |
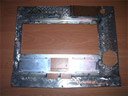
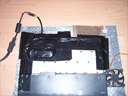
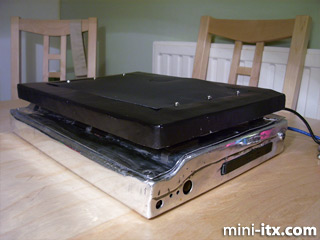
Once I had welded the surrounds on to the keyboard, I measured it on the case and trimmed and bent it to shape.
 |
 |
 |
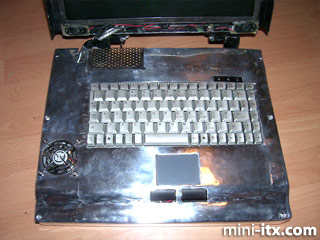
The keyboard in place.
The Monitor
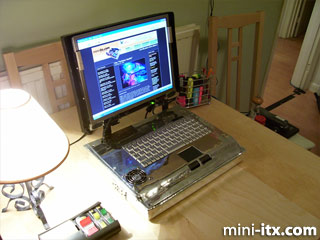
I stripped down my donor monitor and made sure everything worked. Then I mounted it inside the Aluminium frame I had made for it earlier. I made my own VGA cable as all the monitor cables I had seen were too bulky.
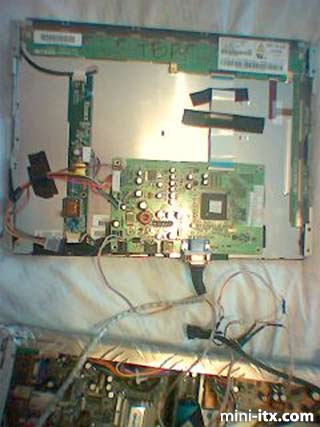
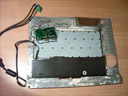
The reverse of the monitor before the plastic back cover was put on. The USB wireless was originally inside the main case, but I moved it into the monitor section to improve reception.

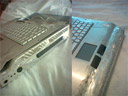
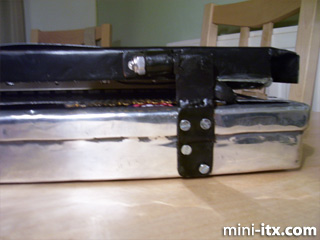
Here�s the laptop closed with the plastic cover in place. The hinges were quite a bit of work and are all hand made from sheet mild-steel and some stainless nut and bolts welded together. The nyloc nuts give enough friction to hold the screen in place. You can also see I have a key lock switch that isolates all power with the turn of the key.
OK, so it does look a bit �Rufty Tufty!� but I worked on armoured tanks in the military and most of my spare time is spent grinding the rust of my old Camaro... my tools in the shed are more �industrial� than pokey little �dremel multi-tool� sized.
The Completed Project

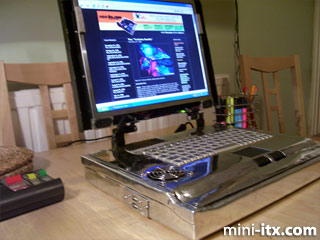
The future of this project includes a new SATA drive so I can use the hardware raid on the board, a new keyboard and top, and if I can find a 'nipple/trackpoint' mouse unit, I will cut a sheet of aluminium with space for a nice ultra flat keyboard and mount the nipple nicely on the cover. I would also like to mount a 19" screen and better speakers, but I want to be careful that it doesn�t turn out to look like a desktop computer on its side!... Oh, and I put a dremel multi tool on my Christmas list :-)
Finally I would like to say a huge thanks to everyone at Mini-ITX for giving all of us all the opportunity to make these projects. Certainly a lot of the cool computers that you have on your site, built by fans of Mini-ITX would not be possible without the stuff in your store, and the positive design/building community that you create on your site.
 |
 |
 |
Quick Links
Mailing Lists:
Mini-ITX Store
Projects:
Show Random
Accordion-ITX
Aircraft Carrier
Ambulator 1
AMD Case
Ammo Box
Ammo Tux
AmmoLAN
amPC
Animal SNES
Atari 800 ITX
Attache Server
Aunt Hagar's Mini-ITX
Bantam PC
BBC ITX B
Bender PC
Biscuit Tin PC
Blue Plate
BlueBox
BMW PC
Borg Appliance
Briefcase PC
Bubbacomp
C1541 Disk Drive
C64 @ 933MHz
CardboardCube
CAUV 2008
CBM ITX-64
Coelacanth-PC
Cool Cube
Deco Box
Devilcat
DOS Head Unit
Dreamcast PC
E.T.PC
Eden VAX
EdenStation IPX
Encyclomedia
Falcon-ITX
Florian
Frame
FS-RouterSwitch
G4 Cube PC
GasCan PC
Gingerbread
Gramaphone-ITX-HD
GTA-PC
Guitar PC
Guitar Workstation
Gumball PC
Hirschmann
HTPC
HTPC2
Humidor 64
Humidor CL
Humidor II
Humidor M
Humidor PC
Humidor V
I.C.E. Unit
i64XBOX
i-EPIA
iGrill
ITX Helmet
ITX TV
ITX-Laptop
Jeannie
Jukebox ITX
KiSA 444
K'nex ITX
Leela PC
Lego 0933 PC
Legobox
Log Cabin PC
Lunchbox PC
Mac-ITX
Manga Doll
Mantle Radio
Mediabox
Mega-ITX
Micro TV
Mini Falcon
Mini Mesh Box
Mini-Cluster
Mobile-BlackBox
Moo Cow Moo
Mr OMNI
NAS4Free
NESPC
OpenELEC
Osh Kosh
Pet ITX
Pictureframe PC
Playstation 2 PC
Playstation PC
Project NFF
PSU PC
Quiet Cubid
R2D2PC
Racing The Light
RadioSphere
Restomod TV
Robotica 2003
Rundfunker
SaturnPC
S-CUBE
SEGA-ITX
SpaceCase
SpacePanel
Spartan Bluebird
Spider Case
Supra-Server
Teddybear
Telefunken 2003
TERA-ITX
The Clock
ToAsTOr
Tortoise Beetle
Tux Server
Underwood No.5
Waffle Iron PC
Windows XP Box
Wraith SE/30
XBMC-ION