
Posted on August 13, 2004
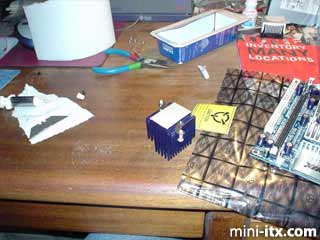
Next I prepared the Zalman heatsink for fitting. I fitted the legs, nuts and bolts, which go together easily as per their instructions, but getting them in just the right place is rather fiddly especially as you're trying to think which way round to put them upside down - you'll see what I mean if you try it. It turned out I got it slightly wrong, so don't do it exactly as I did; I'll explain why later! I gave the heatsink a quick clean, and I spread some Arctic Silver over the base, using a Stanley knife blade to try to ensure as thin and even as possible a layer, to try to ensure the most effective heat transfer from the CPU.
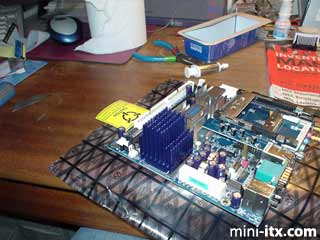
Now it was time to fit the heatsink back onto the board. This was straightforward, after all the test fittings I'd done earlier while trying to get the blasted legs in the right place; I just lined it up, pressed it down firmly, and gently pushed the push-pins through the board again.
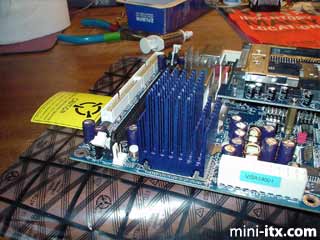
And another shot from a bit closer; you can see that I centred the heatsink as best I could over the CPU:
That's the hard work done now, but you'll remember I got a few more bits and pieces than just the heatsink. I decided to mount the Fan Mate between the front of the case and the fan itself, next to the power converter board:
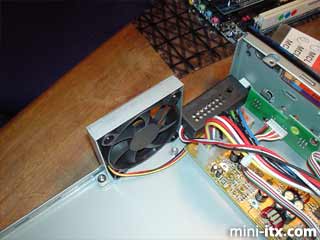
Now it's time to get the board back into the machine, which as ever is rather fiddly, and get all the cables in the right places. The rounded UDMA cables I'd bought had 3 connectors on them, but I wanted to put the hard drive and the CD/DVD drive on separate cables, and there isn't room inside the case for any excess, so I just cut the extra off by pulling the hood back and using a pair of scissors as near to the middle connector as I could. If you modify a UDMA cable like this, keep the end with the blue connector for the motherboard end, as that's how the system identifies the presence of the 80-conductor cable. You can see how neatly the Fan Mate fits in that corner of the case. I plugged its cable into the header that used to be used for the CPU fan, because it was no longer in use.
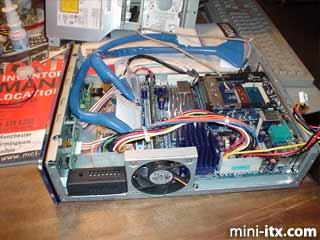
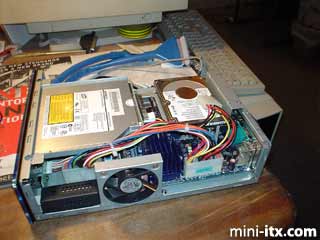
Then I put the bracket with the hard drive and CD/DVD on it back in, and you can start to see why I'd put the new heatsink on the wrong way round: there isn't really room for the big ATX power cable to go round it, but there would have been if I'd put it on turned through 90°, because some of the fins are shorter than the others. I managed to spread the ATX cable out a bit and make it fit, just, and I couldn't be bothered to take everything apart again, but if you're doing this, put the heatsink on turned through 90° with the larger gap between the heatsink and the hard drive bracket.
 |
 |
 |
Quick Links
Mailing Lists:
Mini-ITX Store
Projects:
Show Random
Accordion-ITX
Aircraft Carrier
Ambulator 1
AMD Case
Ammo Box
Ammo Tux
AmmoLAN
amPC
Animal SNES
Atari 800 ITX
Attache Server
Aunt Hagar's Mini-ITX
Bantam PC
BBC ITX B
Bender PC
Biscuit Tin PC
Blue Plate
BlueBox
BMW PC
Borg Appliance
Briefcase PC
Bubbacomp
C1541 Disk Drive
C64 @ 933MHz
CardboardCube
CAUV 2008
CBM ITX-64
Coelacanth-PC
Cool Cube
Deco Box
Devilcat
DOS Head Unit
Dreamcast PC
E.T.PC
Eden VAX
EdenStation IPX
Encyclomedia
Falcon-ITX
Florian
Frame
FS-RouterSwitch
G4 Cube PC
GasCan PC
Gingerbread
Gramaphone-ITX-HD
GTA-PC
Guitar PC
Guitar Workstation
Gumball PC
Hirschmann
HTPC
HTPC2
Humidor 64
Humidor CL
Humidor II
Humidor M
Humidor PC
Humidor V
I.C.E. Unit
i64XBOX
i-EPIA
iGrill
ITX Helmet
ITX TV
ITX-Laptop
Jeannie
Jukebox ITX
KiSA 444
K'nex ITX
Leela PC
Lego 0933 PC
Legobox
Log Cabin PC
Lunchbox PC
Mac-ITX
Manga Doll
Mantle Radio
Mediabox
Mega-ITX
Micro TV
Mini Falcon
Mini Mesh Box
Mini-Cluster
Mobile-BlackBox
Moo Cow Moo
Mr OMNI
NAS4Free
NESPC
OpenELEC
Osh Kosh
Pet ITX
Pictureframe PC
Playstation 2 PC
Playstation PC
Project NFF
PSU PC
Quiet Cubid
R2D2PC
Racing The Light
RadioSphere
Restomod TV
Robotica 2003
Rundfunker
SaturnPC
S-CUBE
SEGA-ITX
SpaceCase
SpacePanel
Spartan Bluebird
Spider Case
Supra-Server
Teddybear
Telefunken 2003
TERA-ITX
The Clock
ToAsTOr
Tortoise Beetle
Tux Server
Underwood No.5
Waffle Iron PC
Windows XP Box
Wraith SE/30
XBMC-ION