
Posted on October 6, 2004
Here, the CD-ROM is screwed on. After some thinking, I found out that a standard power supply (not shown) shall be mounted besides it.
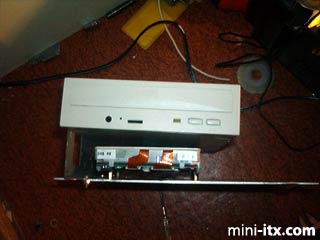
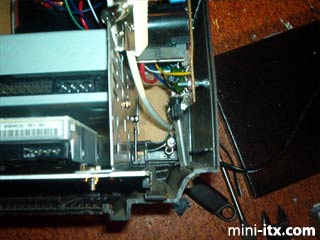
An early test fit inside the case.
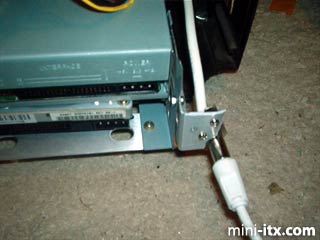
Notice the transparent plastic tube down to the right. It lets me push a card-mounted switch from the outside of the case. The switch is the one that controls the CRTs signal source. By that, I mean whether the tiny, internal screen will show Linux or Discovery Channel. The white cable on the picture will be the antenna input for the TV.
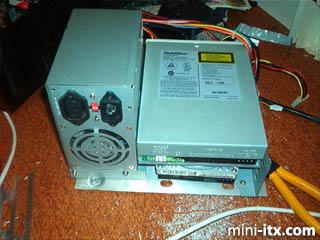
Mounting the power supply:
The image shows the same old bracket as shown before, this time with a power supply on it. I guess the warranty is voided now, because I had to drill a hole in it (not shown) to screw it on to the frame.
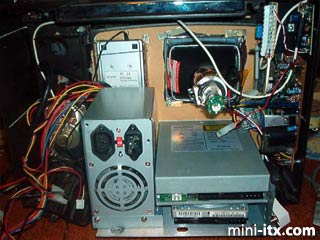
With everything apart from the main board mounted:
The TV Cable
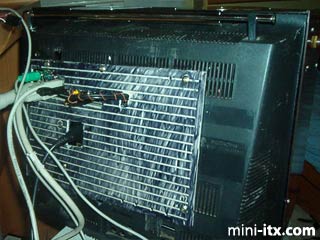
While waiting for the order-by mail- computer parts, I have managed to mount the antenna input. I am very pleased with this. You do remember the transparent plastic tube that switches between TV and Linux? The TV-signal will come through this cable.
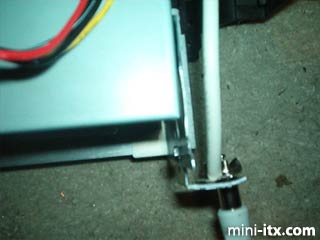
The tiny aluminium bracket that fixes the coax to the frame is actually leftovers from the SCSI CD-ROM drive. I have recycled almost everything from it. The coax plug is fixed to it using the same two screws that mount the cable itself to the plug. The TV plug is available through a hole that I drilled in the backplate. Isn’t it a beauty? Back view…
…and top view.
Completion
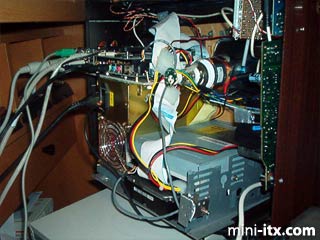
I have now received all the parts Luckily, they seem to fit inside the case with lots of clearance. Here is a picture of all the parts mounted inside, including the main board. The computer is actually installing Windows XP when the picture is taken. My old Mandrake Linux 9.1 unfortunately did not seem to have drivers for the built-in graphics. Therefore, I will have to use Windows and Knoppix until I download a newer Mandrake-version.
Now, it is time to mount the original backplate. Caused by the extremely deep picture tube the TV originally had, there is a box on the backside. None of the parts in my project needet this extra space, so I cut it of.
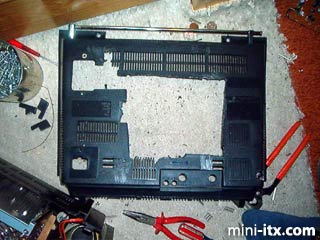
The hole was filled by a piece of hard plastic. From where, you ask? My old SCSI CD-ROM. That old junk really proved useful.
I cut out holes for the connectors on the motherboard, and a hole that the cables will pas through. As you know, the cables for my internal keyboard, CRT and audio amplifier need to be plugged into the motherboard,
and the cables must come from inside.
The backplate used to be gray, but it looked ugly. Therefore, I coloured it with a dried-out, black permanent marker. When I buy a new marker, the backplate will be completely dark.
 |
 |
 |
Quick Links
Mailing Lists:
Mini-ITX Store
Projects:
Show Random
Accordion-ITX
Aircraft Carrier
Ambulator 1
AMD Case
Ammo Box
Ammo Tux
AmmoLAN
amPC
Animal SNES
Atari 800 ITX
Attache Server
Aunt Hagar's Mini-ITX
Bantam PC
BBC ITX B
Bender PC
Biscuit Tin PC
Blue Plate
BlueBox
BMW PC
Borg Appliance
Briefcase PC
Bubbacomp
C1541 Disk Drive
C64 @ 933MHz
CardboardCube
CAUV 2008
CBM ITX-64
Coelacanth-PC
Cool Cube
Deco Box
Devilcat
DOS Head Unit
Dreamcast PC
E.T.PC
Eden VAX
EdenStation IPX
Encyclomedia
Falcon-ITX
Florian
Frame
FS-RouterSwitch
G4 Cube PC
GasCan PC
Gingerbread
Gramaphone-ITX-HD
GTA-PC
Guitar PC
Guitar Workstation
Gumball PC
Hirschmann
HTPC
HTPC2
Humidor 64
Humidor CL
Humidor II
Humidor M
Humidor PC
Humidor V
I.C.E. Unit
i64XBOX
i-EPIA
iGrill
ITX Helmet
ITX TV
ITX-Laptop
Jeannie
Jukebox ITX
KiSA 444
K'nex ITX
Leela PC
Lego 0933 PC
Legobox
Log Cabin PC
Lunchbox PC
Mac-ITX
Manga Doll
Mantle Radio
Mediabox
Mega-ITX
Micro TV
Mini Falcon
Mini Mesh Box
Mini-Cluster
Mobile-BlackBox
Moo Cow Moo
Mr OMNI
NAS4Free
NESPC
OpenELEC
Osh Kosh
Pet ITX
Pictureframe PC
Playstation 2 PC
Playstation PC
Project NFF
PSU PC
Quiet Cubid
R2D2PC
Racing The Light
RadioSphere
Restomod TV
Robotica 2003
Rundfunker
SaturnPC
S-CUBE
SEGA-ITX
SpaceCase
SpacePanel
Spartan Bluebird
Spider Case
Supra-Server
Teddybear
Telefunken 2003
TERA-ITX
The Clock
ToAsTOr
Tortoise Beetle
Tux Server
Underwood No.5
Waffle Iron PC
Windows XP Box
Wraith SE/30
XBMC-ION