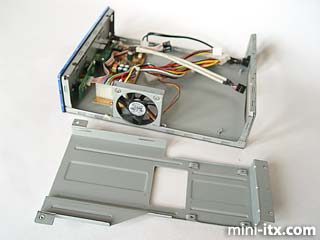
Unscrewing and removing the drive tray reveals
more of the inner workings of the 3688. The white doubled-up
cable in the centre
can be connected to the internal USB 2.0 header on an EPIA M. Classic EPIAs and
EPIA Vs will fit, but will not be able to use the USB 2.0 ports on the front.
The Internal ATX power cable has a
floppy-style connector and a standard 4-pin Molex connector.
These connect to any optical drive that is fitted, and to
any 2.5" hard drive that is fitted, with a cable adaptor - the Molex connector
is not intended for use with a 3.5" hard drive.
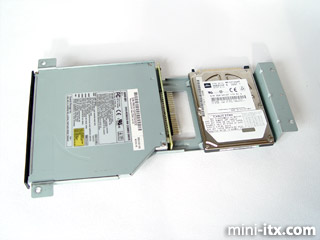
We fitted an optical drive and hard drive
to the drive tray - it's time to find that impossibly small
screwdriver we reserve for such purposes. Don't forget to
screw in the slimline IDE to desktop IDE adaptor to the back
of
your optical drive.
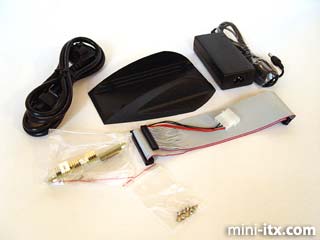
These are the goodies you get in the box.
A power cable, the power supply, a plastic vertical-mounting
stand (thankfully much more substantial and effective than
the
stand supplied
with
the
26xx models), a slimline IDE to desktop IDE adaptor for an
optical drive, and a 2.5" HDD conversion and connection
cable for a laptop-sized HDD, and a bag of assorted screws.
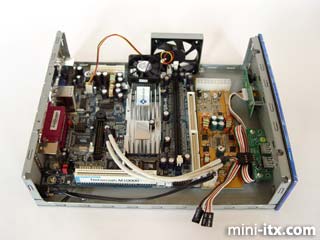
Building tip #1: Make sure
the I/O panel is firmly fitted at all four corners into the
space at the back of the case. It is a snug fit between the
motherboard and DC-DC converter internally, but very easy
if you snap the panel in fully. We'll take this opportunity
to attach the USB 2.0 header cable and the case fan to the
header on the motherboard.
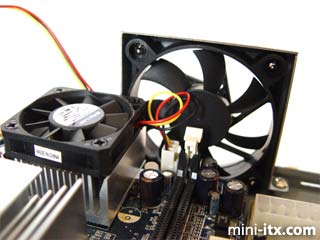
Tip #2: Loop your CPU fan cable round tightly,
to avoid it getting sucked through the immense vortex created
by the 60mm case fan.
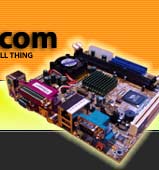
It might also be a good time to add some RAM.
Fitting the
drive bay -->