
Posted on June 16, 2003
Introduction
|
The Atari 800 was my first love. The year was 1982, and the specs were cutting-edge: 1.79 MHz, 48K of RAM (should be enough for almost anything, right?) Well, after years of playing games, times changed and I had graduated on to bigger, faster, sexier computers. The Atari went into the closet...then eventually faded and disappeared.
Flash forward to 2000. I've missed that clunky old Atari. Well, after a chance meeting with an elderly gentleman, I came into a very large quantity of free Atari gear that he had been hoarding and wanted to donate to "a loving home". I've been reveling in nostalgia ever since.
There has always been a cult community of Atari 8-bit enthusiasts, keeping the platform alive, and even developing some very interesting new technologies that allow interface to modern PCs and peripherals.
When I was alerted to the new Mini-ITX standard, I immediately thought: Wouldn't it be cool to retrofit an Atari 800 to be a full-fledged Windows PC, with built-in Atari interface, to act as a high-speed Atari I/O Server? The ITX mobo should fit, and the resulting PC would have a designed-in useful purpose. As a side benefit, I could use it as a DVD player! I had my work cut out for me...
Step-by-step commentary
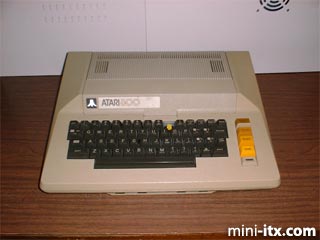
Here's the perfect donor unit: dirty, a little beaten up, missing keyboard keys, unable to boot up.
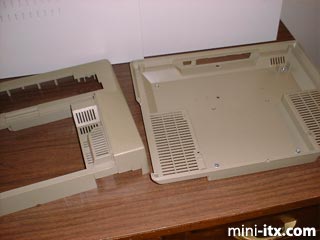
The first step was to completely gut the unit, and throw away the internals. I realized immediately that there would be a few logistical challenges, as the inside of the atari case is not linear. As you can see in the picture, there are steps and angles, as well as support pillars all over the upper half of the case.
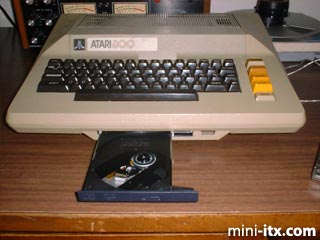
The first thing I did was to use a Dremel tool to mill out a slot for a notebook-style CD burner. The Atari has four 9-pin joystick slots on the lower front of the case. Three of these are just wide enough for a standard notebook CDR.
I also required a self-contained power supply, particularly well-suited for ITX in set-top DVD type applications. I found a nice unit from PC Power and Cooling. I decided on the best location for this power supply, then set about to milling out holes in the case to accomodate the rear panel, and to cut out the case support pillars to fit the power box inside snugly.
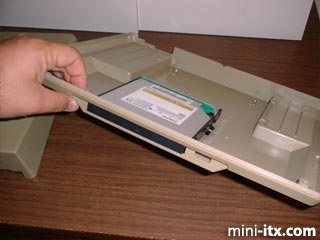
I got my hands on a Samsung CDRW/DVD drive that came complete with mounting plate and integral IDE connector adapter. The first test fitting was perfect.
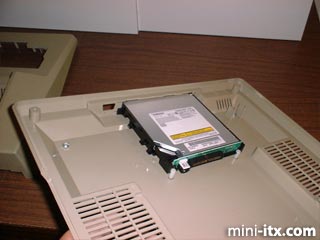
Due to the shape of the case, I had to figure out how to suspend the rear-end of the CDR about 8mm above the floor of the case. I decided that a simple but effective solution would be to mount nylon standoff posts with narrow slots cut out to hold the rear of the mounting plate. Perfect--sturdy enough and lightweight.
The Atari's keyboard was going to be a major problem. The 800's keyboard assembly is huge and heavy. It literally occupies the entire front end of the case (exactly where the CDR is now sitting). At first, I wasn't sure how I was going to solve this. First, I thought I might find a notebook PC keyboard that might fit in that space, but that proved to be highly impractical for several reasons (I won't bore you with the details).
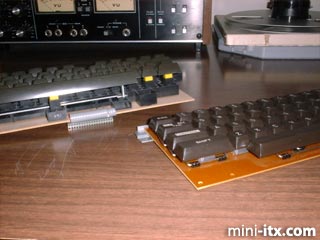
As it turns out, the later model Ataris (XL series) used a totally different keyboard that was wider, but very slim. This would work as a replacement, but it would have to be a non-functional facade.
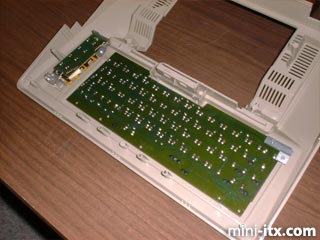
I had to make several cuts to the new keyboard to make it fit properly. I wanted to retain the use of the console keys (RESET, START, etc.), so I cut that part of the keyboard off and used some creative mounting to make it work with the older style buttons (see left side of photo)
 |
 |
 |
Quick Links
Mailing Lists:
Mini-ITX Store
Projects:
Show Random
Accordion-ITX
Aircraft Carrier
Ambulator 1
AMD Case
Ammo Box
Ammo Tux
AmmoLAN
amPC
Animal SNES
Atari 800 ITX
Attache Server
Aunt Hagar's Mini-ITX
Bantam PC
BBC ITX B
Bender PC
Biscuit Tin PC
Blue Plate
BlueBox
BMW PC
Borg Appliance
Briefcase PC
Bubbacomp
C1541 Disk Drive
C64 @ 933MHz
CardboardCube
CAUV 2008
CBM ITX-64
Coelacanth-PC
Cool Cube
Deco Box
Devilcat
DOS Head Unit
Dreamcast PC
E.T.PC
Eden VAX
EdenStation IPX
Encyclomedia
Falcon-ITX
Florian
Frame
FS-RouterSwitch
G4 Cube PC
GasCan PC
Gingerbread
Gramaphone-ITX-HD
GTA-PC
Guitar PC
Guitar Workstation
Gumball PC
Hirschmann
HTPC
HTPC2
Humidor 64
Humidor CL
Humidor II
Humidor M
Humidor PC
Humidor V
I.C.E. Unit
i64XBOX
i-EPIA
iGrill
ITX Helmet
ITX TV
ITX-Laptop
Jeannie
Jukebox ITX
KiSA 444
K'nex ITX
Leela PC
Lego 0933 PC
Legobox
Log Cabin PC
Lunchbox PC
Mac-ITX
Manga Doll
Mantle Radio
Mediabox
Mega-ITX
Micro TV
Mini Falcon
Mini Mesh Box
Mini-Cluster
Mobile-BlackBox
Moo Cow Moo
Mr OMNI
NAS4Free
NESPC
OpenELEC
Osh Kosh
Pet ITX
Pictureframe PC
Playstation 2 PC
Playstation PC
Project NFF
PSU PC
Quiet Cubid
R2D2PC
Racing The Light
RadioSphere
Restomod TV
Robotica 2003
Rundfunker
SaturnPC
S-CUBE
SEGA-ITX
SpaceCase
SpacePanel
Spartan Bluebird
Spider Case
Supra-Server
Teddybear
Telefunken 2003
TERA-ITX
The Clock
ToAsTOr
Tortoise Beetle
Tux Server
Underwood No.5
Waffle Iron PC
Windows XP Box
Wraith SE/30
XBMC-ION