
Posted on October 6, 2004
Introduction
|
My old ATX computer was noisy, slow and unstable. Inspired by other mini-itx-projects, I decided to build a new one. Sick of those boring, grey cases, I decided it was going to be radical.
First, I begged my electronics-teacher for a broken oscilloscope, but none of the school's oscilloscopes were broken.
Then I looked at a microwawe-oven that I found in a container. This was no smaller than a standard ATX case. What a waste of a small Mini-ITX motherboard it was to put it in a HUGE case like that! The oven went back where it came from.
I considered several radio recievers, but at last, I remembered an old Black & White TV located at the cottage. I just had to use it.
Just one problem: The cottage is 200km away! I had to wait for the next vacation. When the vacation came and it was time to go to the cottage, I decided to stay home and prepare for the project.
This is where the building begins.
Construction
This is what the TV looked like when I got it. It has just collected dust over the years, so nobody will miss it. It wasn’t any good, either. I wired it to the cable at home, and "snow" was all I could find. No channels were clear.
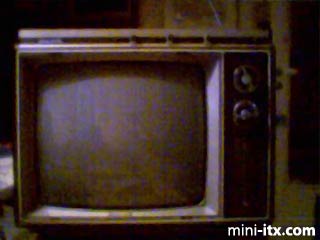
I'm sorry about the quality, this, and some other images, were taken with a webcam, of course without blitz.
But it will get better.
I don't know the age of the reciever, but on the back it says "All Transistor TV Receiver". If tubes were still an option, I guess it is old.
The CRT Panel
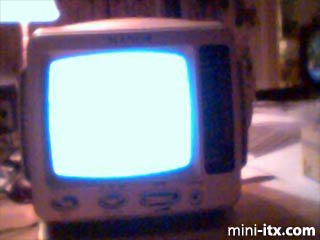
Already before my family came home with the TV, I started on the project. I planned to insert a smaller CRT than the original, and get enough space for a numeric keyboart and a CD-ROM next to it. The screen I put in cost me only 28 dollars...
I have some serious concerns about the quality, and the store where I bought it does not sell them anymore... I hope the screen lasts... :-)
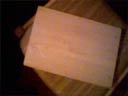
Here is a picture of the cheap CRT:
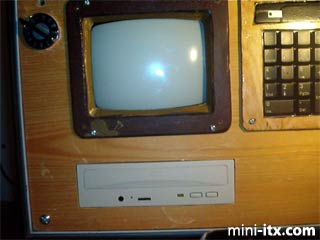
I used my father's Dremel-clone to cut the cheap TV to pieces. I kept the internals and the faceplate that holds the tube. I also cut a wooden panel with a hole that matches the CRT...
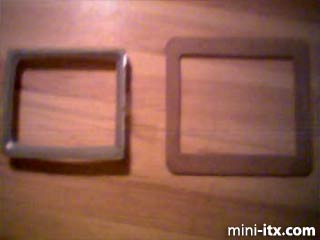
...and glued the wooden plate to the frame from the cheap TV.
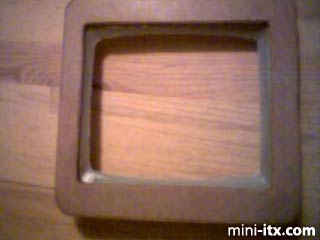
I love that panel. I later decorated it with a golden snail, and covered it with epoxy glue instead of paint.
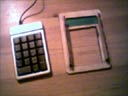
The Keyboard Panel
I had decided to install a numeric keyboard next to the CRT. Both because it will look good, and because it will make it possible to operate the most basic functions of the computer without a real keyboard. It has a USB plug, so installing it on the computer is not difficult. Mounting it to the case, however, is trickier... :-(
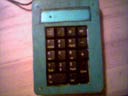
The panel itself is made of wood. I wanted to cover it with a green plastic foil for the retro-look,
but the epoxy glue did not stick to the green foil.
Because of that, I later decided to remove the foil.
|
|
|
Isn't it a beauty? You don’t have to answer that.
 |
 |
 |
Quick Links
Mailing Lists:
Mini-ITX Store
Projects:
Show Random
Accordion-ITX
Aircraft Carrier
Ambulator 1
AMD Case
Ammo Box
Ammo Tux
AmmoLAN
amPC
Animal SNES
Atari 800 ITX
Attache Server
Aunt Hagar's Mini-ITX
Bantam PC
BBC ITX B
Bender PC
Biscuit Tin PC
Blue Plate
BlueBox
BMW PC
Borg Appliance
Briefcase PC
Bubbacomp
C1541 Disk Drive
C64 @ 933MHz
CardboardCube
CAUV 2008
CBM ITX-64
Coelacanth-PC
Cool Cube
Deco Box
Devilcat
DOS Head Unit
Dreamcast PC
E.T.PC
Eden VAX
EdenStation IPX
Encyclomedia
Falcon-ITX
Florian
Frame
FS-RouterSwitch
G4 Cube PC
GasCan PC
Gingerbread
Gramaphone-ITX-HD
GTA-PC
Guitar PC
Guitar Workstation
Gumball PC
Hirschmann
HTPC
HTPC2
Humidor 64
Humidor CL
Humidor II
Humidor M
Humidor PC
Humidor V
I.C.E. Unit
i64XBOX
i-EPIA
iGrill
ITX Helmet
ITX TV
ITX-Laptop
Jeannie
Jukebox ITX
KiSA 444
K'nex ITX
Leela PC
Lego 0933 PC
Legobox
Log Cabin PC
Lunchbox PC
Mac-ITX
Manga Doll
Mantle Radio
Mediabox
Mega-ITX
Micro TV
Mini Falcon
Mini Mesh Box
Mini-Cluster
Mobile-BlackBox
Moo Cow Moo
Mr OMNI
NAS4Free
NESPC
OpenELEC
Osh Kosh
Pet ITX
Pictureframe PC
Playstation 2 PC
Playstation PC
Project NFF
PSU PC
Quiet Cubid
R2D2PC
Racing The Light
RadioSphere
Restomod TV
Robotica 2003
Rundfunker
SaturnPC
S-CUBE
SEGA-ITX
SpaceCase
SpacePanel
Spartan Bluebird
Spider Case
Supra-Server
Teddybear
Telefunken 2003
TERA-ITX
The Clock
ToAsTOr
Tortoise Beetle
Tux Server
Underwood No.5
Waffle Iron PC
Windows XP Box
Wraith SE/30
XBMC-ION