
Posted on 25 May, 2005
Final Installation
Mini-ITX motherboard (top view) 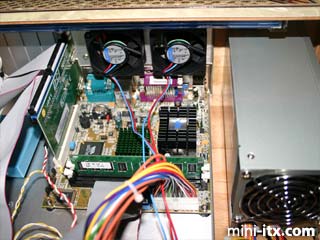
Here I started the final installation of the computer components. The motherboard chassis and power supply were attached to the "button" side of the accordion frame, and the entire computer component assembly was connected together.
RAID5 hard drives w/quiet fans (top view)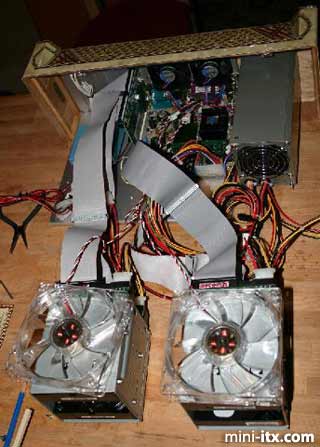
Jim used a RAID PCI card in addition to the motherboard Primary and Secondary IDE connections and placed each of the 4 drives as Master on each IDE channel. This would guarantee that the RAID5 array would work properly. I then carefully ran the loose components through the bellows, secured the chassis to the wooden base with nuts and bolts, connected all the wiring, and tweaked the lighting controller until the lights worked properly.
Completed assembly (front view)
Here's the finished server on it's stand. I shaped acoustic foam onto the bases of the stand in order to keep the server steady as it laid on it's side at an angle.
Case stand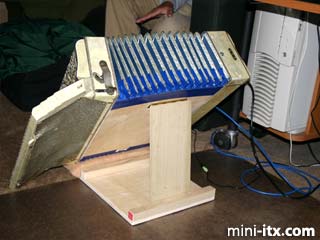
For the stand I used a hinge and a 1/2" thick birch board to act as a swinging support which gave me more stability with the server perched at an angle. The stand base is birch plywood with 1"x1" birch strips acting as a stopper for the upholstered foam base and the swinging support.
Lit up (front view)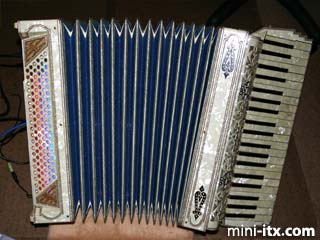
The cold cathode lighting is set to flicker with the amplitude of the music played on the server. I think it's one of the coolest features on the system.
User interface: main page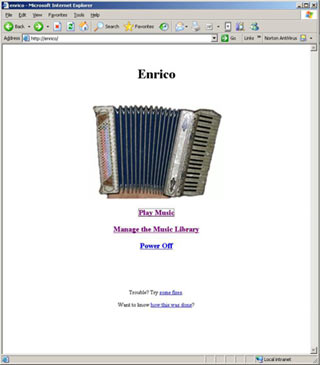
Jim programmed the user interface to work in any browser on my home network. I just run an ethernet cable from the server to my network router and then access the server by typing in the host IP address from any browser in the house. We also edited the hosts file located in C:\Windows\system32\drivers\etc folder by adding the IP address followed by the server name. This allows us to just type in "enrico" in an XP web browser and jump directly to the user interface.
 |
 |
 |
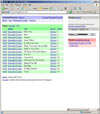 |
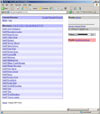
Here are several views of the library search engine and player Jim put together. See the Technical notes at the top of the page for more information on this.
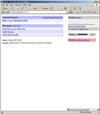
User interface: ripping and management tools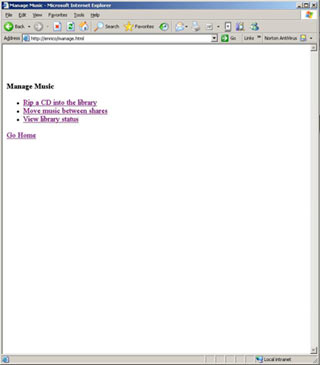
Jim also programmed tools to rip and convert music CDs into flac format (a loss-less compression scheme which doubles our hard drive capacity). The server can also play wav and mp3 files. Other tools are for moving music to and from our shared folders (in case we have to tweak or copy music files from any of the household computers), and a library status report which tells us the health of the server and where we're at with our hard drive capacity.
 |
 |
 |
Quick Links
Mailing Lists:
Mini-ITX Store
Projects:
Show Random
Accordion-ITX
Aircraft Carrier
Ambulator 1
AMD Case
Ammo Box
Ammo Tux
AmmoLAN
amPC
Animal SNES
Atari 800 ITX
Attache Server
Aunt Hagar's Mini-ITX
Bantam PC
BBC ITX B
Bender PC
Biscuit Tin PC
Blue Plate
BlueBox
BMW PC
Borg Appliance
Briefcase PC
Bubbacomp
C1541 Disk Drive
C64 @ 933MHz
CardboardCube
CAUV 2008
CBM ITX-64
Coelacanth-PC
Cool Cube
Deco Box
Devilcat
DOS Head Unit
Dreamcast PC
E.T.PC
Eden VAX
EdenStation IPX
Encyclomedia
Falcon-ITX
Florian
Frame
FS-RouterSwitch
G4 Cube PC
GasCan PC
Gingerbread
Gramaphone-ITX-HD
GTA-PC
Guitar PC
Guitar Workstation
Gumball PC
Hirschmann
HTPC
HTPC2
Humidor 64
Humidor CL
Humidor II
Humidor M
Humidor PC
Humidor V
I.C.E. Unit
i64XBOX
i-EPIA
iGrill
ITX Helmet
ITX TV
ITX-Laptop
Jeannie
Jukebox ITX
KiSA 444
K'nex ITX
Leela PC
Lego 0933 PC
Legobox
Log Cabin PC
Lunchbox PC
Mac-ITX
Manga Doll
Mantle Radio
Mediabox
Mega-ITX
Micro TV
Mini Falcon
Mini Mesh Box
Mini-Cluster
Mobile-BlackBox
Moo Cow Moo
Mr OMNI
NAS4Free
NESPC
OpenELEC
Osh Kosh
Pet ITX
Pictureframe PC
Playstation 2 PC
Playstation PC
Project NFF
PSU PC
Quiet Cubid
R2D2PC
Racing The Light
RadioSphere
Restomod TV
Robotica 2003
Rundfunker
SaturnPC
S-CUBE
SEGA-ITX
SpaceCase
SpacePanel
Spartan Bluebird
Spider Case
Supra-Server
Teddybear
Telefunken 2003
TERA-ITX
The Clock
ToAsTOr
Tortoise Beetle
Tux Server
Underwood No.5
Waffle Iron PC
Windows XP Box
Wraith SE/30
XBMC-ION