Posted on March 9, 2005
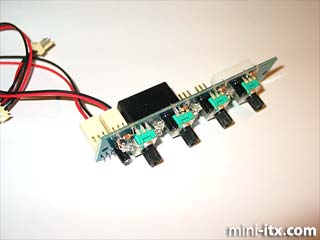
Initially it was planned to build a custom PWM fan controller, but instead a pre built floppy bay rheobus was bought due to being so cheap, and saving a lot of trouble. One problem was due to thicker perspex being used the original capacitors were in the way, so they were desoldered and new capacitors were soldered onto the back of the PCB.
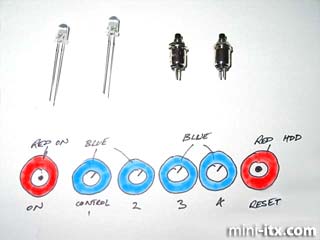
One feature of the rheobus are the lighted rings around the knobs that change intensity proportional to the fan speed. This feature was kept and copied onto the power/reset buttons adding red lighted rings around them. The red and blue LEDs would match the cold cathodes. The power/reset buttons were some nice looking small buttons with black heads, and to add the red lighting effect some red super bright LEDs were used.
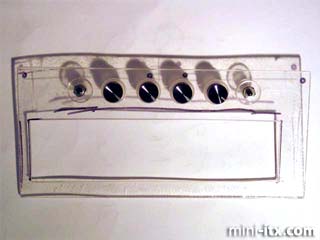
Clear perspex was painted black, except for the rings around the buttons which was masked to allow the LEDs to shine through.
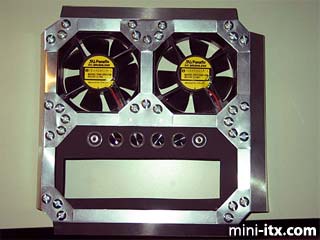
The painted perspex was attached to the rest of the back face similar to the rest of the fans. The rheobus and LEDs were then hot glued to the back.
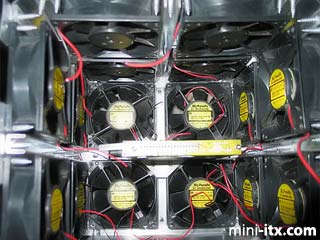
Cool interior shot before all the wiring starts to make things messy.
The way the fans had been implemented were the front, left and right faces were blowing in and the back and top were blowing out. This worked out to be a 12 to 6 ratio respectively, ideally the same number of fans should be blowing in and out, but it was thought it would just be too annoying having them constantly blowing at you.
Internals
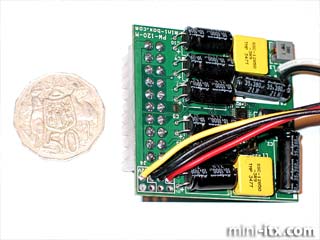
The power supply which was chosen to power the beast was a little plug in board that didn't take up any extra height on the motherboard, yet was still a decent 200 Watts.
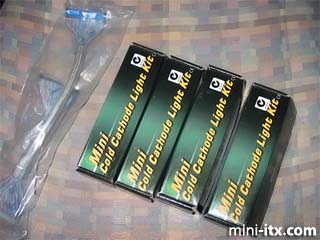
A red and blue lighting effect was chosen for the case, due to space restrictions mini cold cathodes would only fit and it was decided that to add one to each of the the four vertical edges alternating from blue to red. From the same shop a silver rounded IDE cable was bought, for better airflow of course ; )
The goodies.
 |
 |
 |
Quick Links
Mailing Lists:
Mini-ITX Store
Projects:
Show Random
Accordion-ITX
Aircraft Carrier
Ambulator 1
AMD Case
Ammo Box
Ammo Tux
AmmoLAN
amPC
Animal SNES
Atari 800 ITX
Attache Server
Aunt Hagar's Mini-ITX
Bantam PC
BBC ITX B
Bender PC
Biscuit Tin PC
Blue Plate
BlueBox
BMW PC
Borg Appliance
Briefcase PC
Bubbacomp
C1541 Disk Drive
C64 @ 933MHz
CardboardCube
CAUV 2008
CBM ITX-64
Coelacanth-PC
Cool Cube
Deco Box
Devilcat
DOS Head Unit
Dreamcast PC
E.T.PC
Eden VAX
EdenStation IPX
Encyclomedia
Falcon-ITX
Florian
Frame
FS-RouterSwitch
G4 Cube PC
GasCan PC
Gingerbread
Gramaphone-ITX-HD
GTA-PC
Guitar PC
Guitar Workstation
Gumball PC
Hirschmann
HTPC
HTPC2
Humidor 64
Humidor CL
Humidor II
Humidor M
Humidor PC
Humidor V
I.C.E. Unit
i64XBOX
i-EPIA
iGrill
ITX Helmet
ITX TV
ITX-Laptop
Jeannie
Jukebox ITX
KiSA 444
K'nex ITX
Leela PC
Lego 0933 PC
Legobox
Log Cabin PC
Lunchbox PC
Mac-ITX
Manga Doll
Mantle Radio
Mediabox
Mega-ITX
Micro TV
Mini Falcon
Mini Mesh Box
Mini-Cluster
Mobile-BlackBox
Moo Cow Moo
Mr OMNI
NAS4Free
NESPC
OpenELEC
Osh Kosh
Pet ITX
Pictureframe PC
Playstation 2 PC
Playstation PC
Project NFF
PSU PC
Quiet Cubid
R2D2PC
Racing The Light
RadioSphere
Restomod TV
Robotica 2003
Rundfunker
SaturnPC
S-CUBE
SEGA-ITX
SpaceCase
SpacePanel
Spartan Bluebird
Spider Case
Supra-Server
Teddybear
Telefunken 2003
TERA-ITX
The Clock
ToAsTOr
Tortoise Beetle
Tux Server
Underwood No.5
Waffle Iron PC
Windows XP Box
Wraith SE/30
XBMC-ION

