
Posted on July 6, 2003
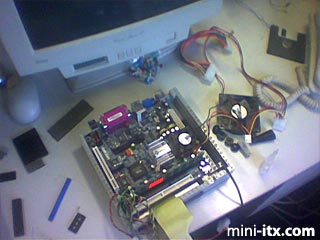
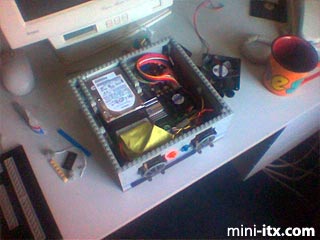
As I moved up the case I kept encountering small problems, like the board mounting, you can see the solution to that in this picture in the bottom right corner of the case. At this point I was still dreading having to mount the hard-drive since my previous mounting hadn't been that successful, and relied rather heavily on being attached to the lid (and hence making it difficult to remove the lid). Notice the mess of wires at the bottom left of the case, those were ripped from a standard PC case, there are two switches (power and reset) and two LEDs (power and HDD), and I still had the problem of mounting these in the case to make them work.
The power switches weren't a problem, I glued them into 1 block wide gaps in the front of the case, but I still had the problem of how to mount the LEDs, but decided to leave that since I want to replace the square ones with round ones that will fit into the holes in Technic bricks. As you can see from the photo I'd left two holes in the front, these were for my case windows, the cockpits from the two TIE Bomber kits I'd brought (mainly for the flat tiles, but other components from them came in so handy I’m glad I got them now). I still hadn't decided what to do about the hard drive yet, and the power cable was also giving me headaches.
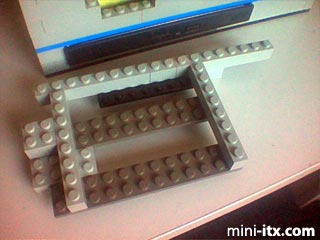
They say that patience is a virtue, and well it finally paid off, above is the hard drive mounting it goes in the top left corner of the case, and is very sturdy, although it doesn't stand up too well when on the desk (there's no support under the bottom right corner), but when mounted in the case it gives a good solid mount for the drive.
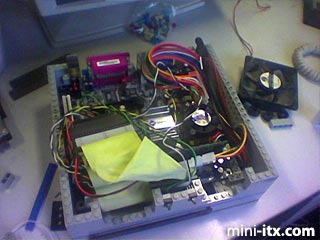
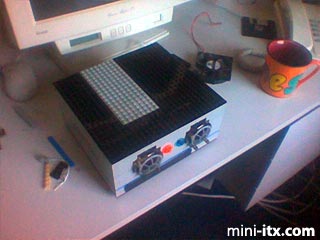
Here the drive mounting has been installed, the drive sits in here, the cable ensures it stays in place. You may also notice that the power cable (back right) is now held in place, this took some doing, the end was slightly too wide for one brick, but a little bit of brute force and I managed to wedge it in nice and tight. You might also spot that the two switches now have nice bright caps on them to make them easier to see and push, the orange one is reset, the blue on is power.
As you can see I've almost finished now, the case windows (cockpits) are in, the cables have been tidied up inside, just to the left of the picture you can see the lid of the case.
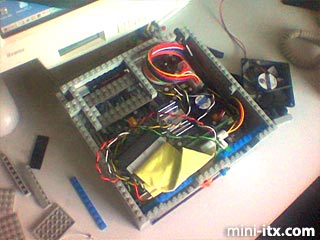
That's it really, the lid went on, and it was time to connect the power and fire her up. Now all I needed was a portable display.
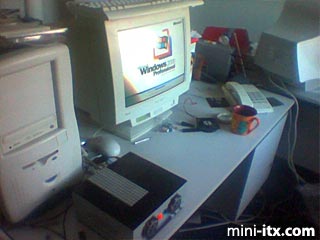
Windows 2000 running on the machine.
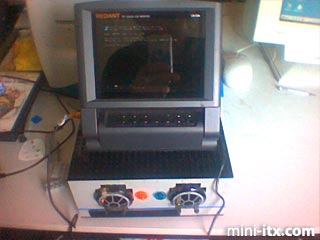
This display came from Lik-Sang, at the price it was selling for it would have been churlish not to buy one, I still need to find a way to power the display from the PC itself, but that's another problem entirely.
Finally
The name of the machine comes from the fact that all Lego products have a 4 digit product code, 0933 is the processor speed of the machine and so seemed like a suitable code for this PC.
 |
 |
 |
Quick Links
Mailing Lists:
Mini-ITX Store
Projects:
Show Random
Accordion-ITX
Aircraft Carrier
Ambulator 1
AMD Case
Ammo Box
Ammo Tux
AmmoLAN
amPC
Animal SNES
Atari 800 ITX
Attache Server
Aunt Hagar's Mini-ITX
Bantam PC
BBC ITX B
Bender PC
Biscuit Tin PC
Blue Plate
BlueBox
BMW PC
Borg Appliance
Briefcase PC
Bubbacomp
C1541 Disk Drive
C64 @ 933MHz
CardboardCube
CAUV 2008
CBM ITX-64
Coelacanth-PC
Cool Cube
Deco Box
Devilcat
DOS Head Unit
Dreamcast PC
E.T.PC
Eden VAX
EdenStation IPX
Encyclomedia
Falcon-ITX
Florian
Frame
FS-RouterSwitch
G4 Cube PC
GasCan PC
Gingerbread
Gramaphone-ITX-HD
GTA-PC
Guitar PC
Guitar Workstation
Gumball PC
Hirschmann
HTPC
HTPC2
Humidor 64
Humidor CL
Humidor II
Humidor M
Humidor PC
Humidor V
I.C.E. Unit
i64XBOX
i-EPIA
iGrill
ITX Helmet
ITX TV
ITX-Laptop
Jeannie
Jukebox ITX
KiSA 444
K'nex ITX
Leela PC
Lego 0933 PC
Legobox
Log Cabin PC
Lunchbox PC
Mac-ITX
Manga Doll
Mantle Radio
Mediabox
Mega-ITX
Micro TV
Mini Falcon
Mini Mesh Box
Mini-Cluster
Mobile-BlackBox
Moo Cow Moo
Mr OMNI
NAS4Free
NESPC
OpenELEC
Osh Kosh
Pet ITX
Pictureframe PC
Playstation 2 PC
Playstation PC
Project NFF
PSU PC
Quiet Cubid
R2D2PC
Racing The Light
RadioSphere
Restomod TV
Robotica 2003
Rundfunker
SaturnPC
S-CUBE
SEGA-ITX
SpaceCase
SpacePanel
Spartan Bluebird
Spider Case
Supra-Server
Teddybear
Telefunken 2003
TERA-ITX
The Clock
ToAsTOr
Tortoise Beetle
Tux Server
Underwood No.5
Waffle Iron PC
Windows XP Box
Wraith SE/30
XBMC-ION