
Posted on October 09, 2014
Fitting the guts
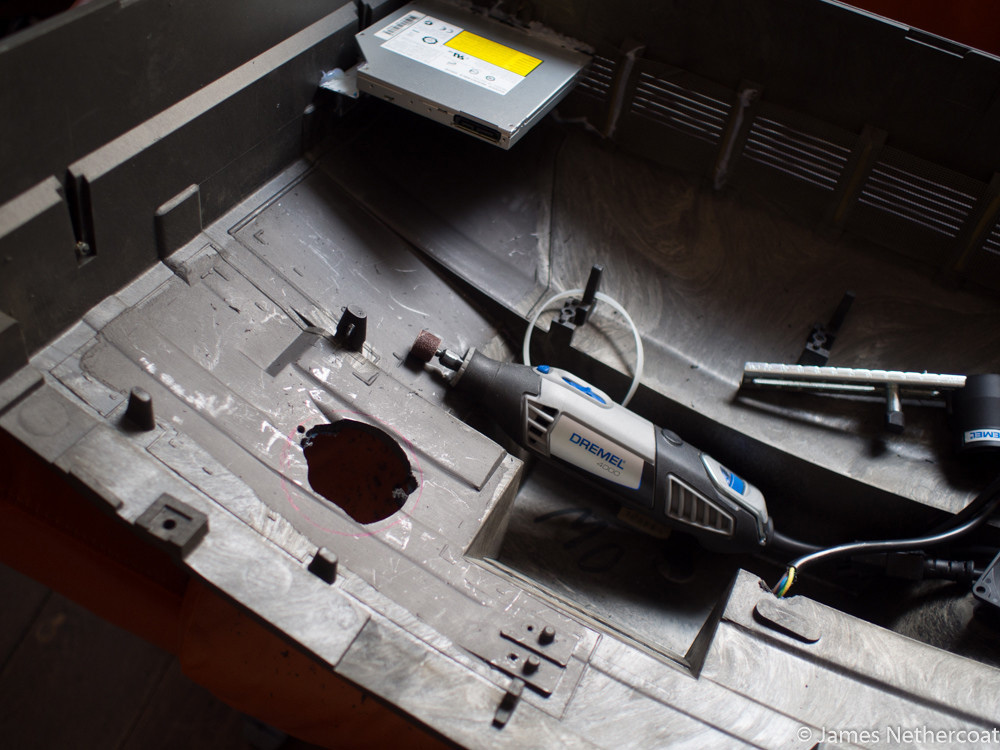
Next thing I tackled was the CD drive. I had many thoughts about where to mount this drive and I was going to go with cutting a slot in the side casing when the idea came to me about using the vents on the top as the slot for a super stealth cd drive. Pretty happy with how it works!

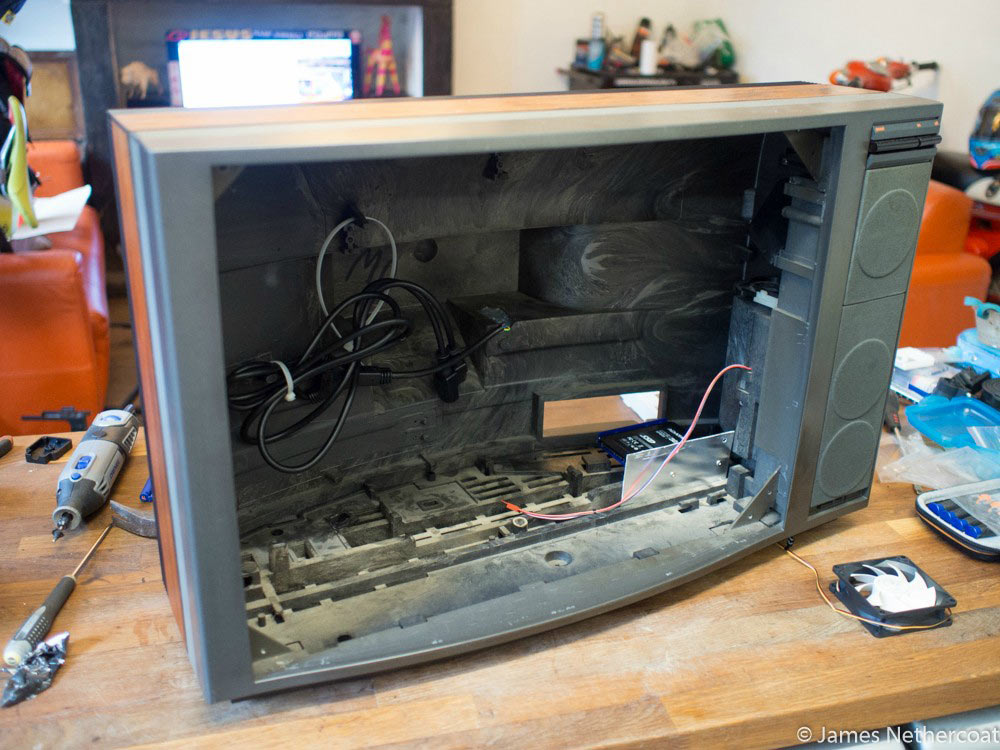
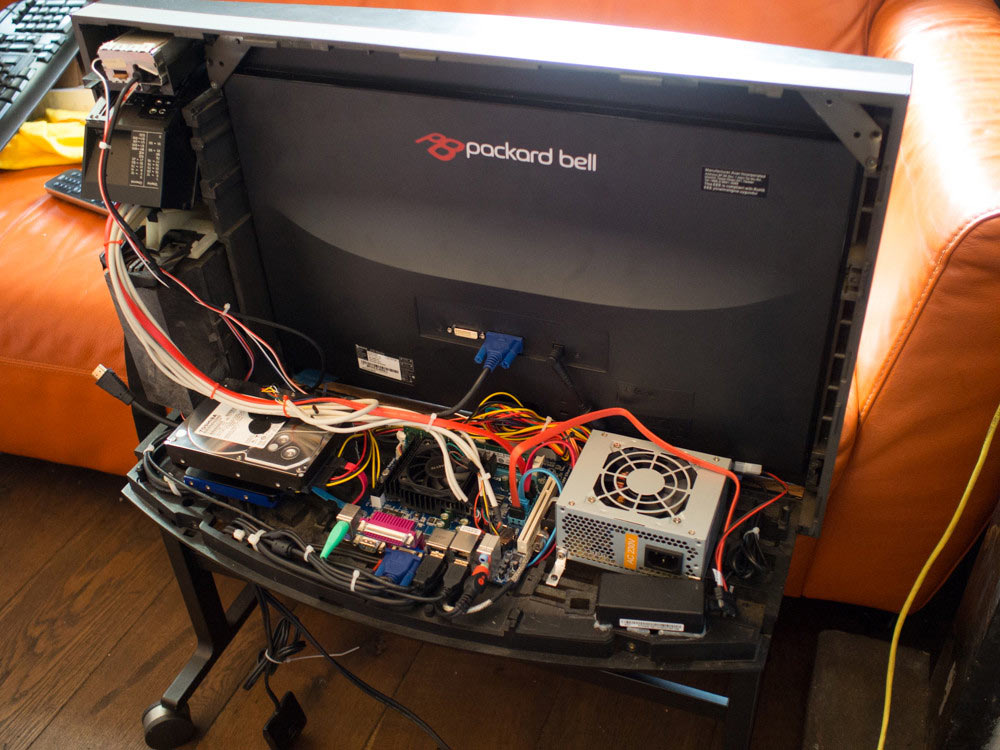
On to fitting the guts that power this thing! Given that there was so much room inside, I really didn't have to do much to mount the board and PSU as they all sit next to each other nicely. I just made some brackets to hold the PSU in and mounted the motherboard directly to the base.

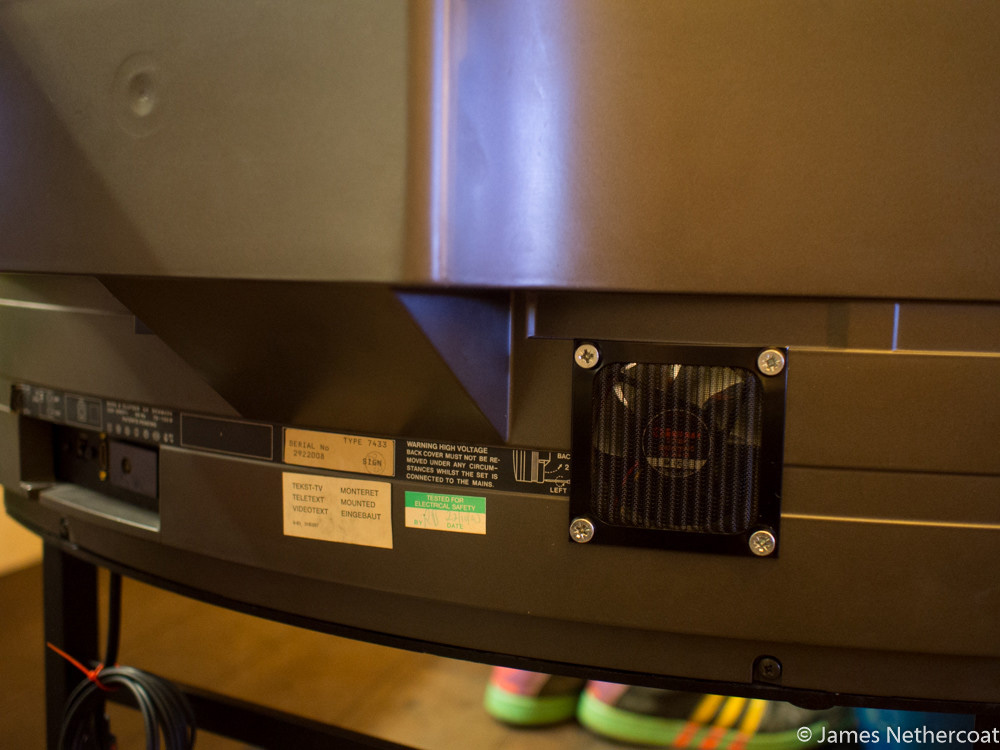
Also I cut out the rear case and put a super quiet 80mm fan in there to aid with airflow a little bit.
Another neat little feature I was excited about was the pop out drawer on the front of the TV. This used to house the volume and tuning controls for the TV but I just about managed to squeeze some USB ports and a card reader in there! It was a pretty tight fit though. Unfortunately i never got round to making a proper fascia for all this so it still looks like this, although you never really see it.
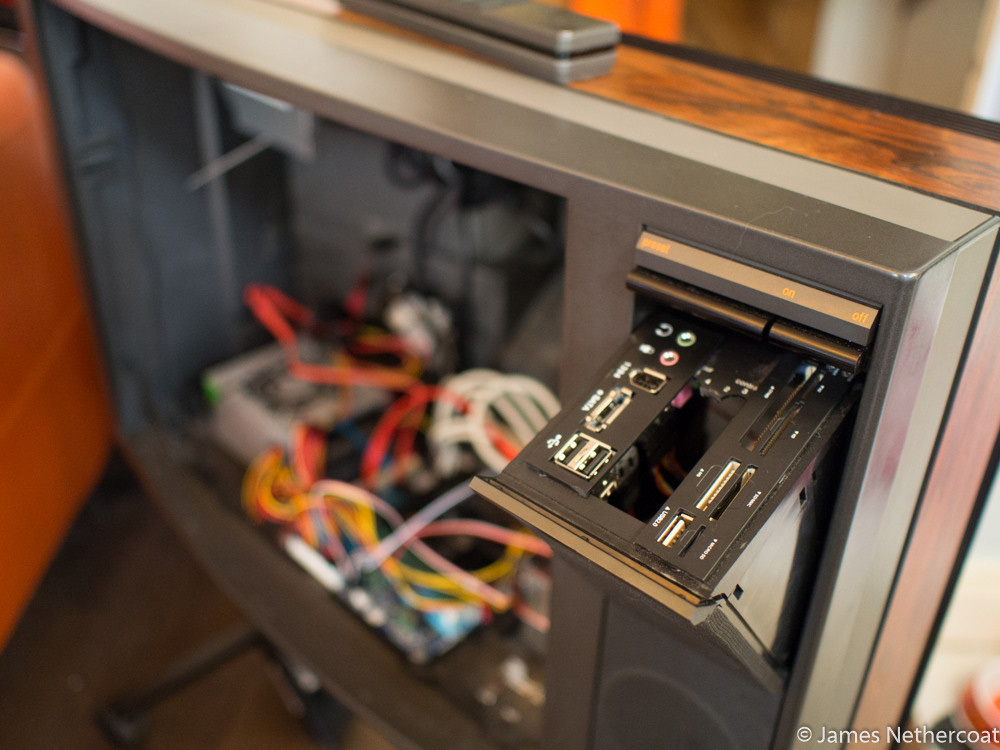
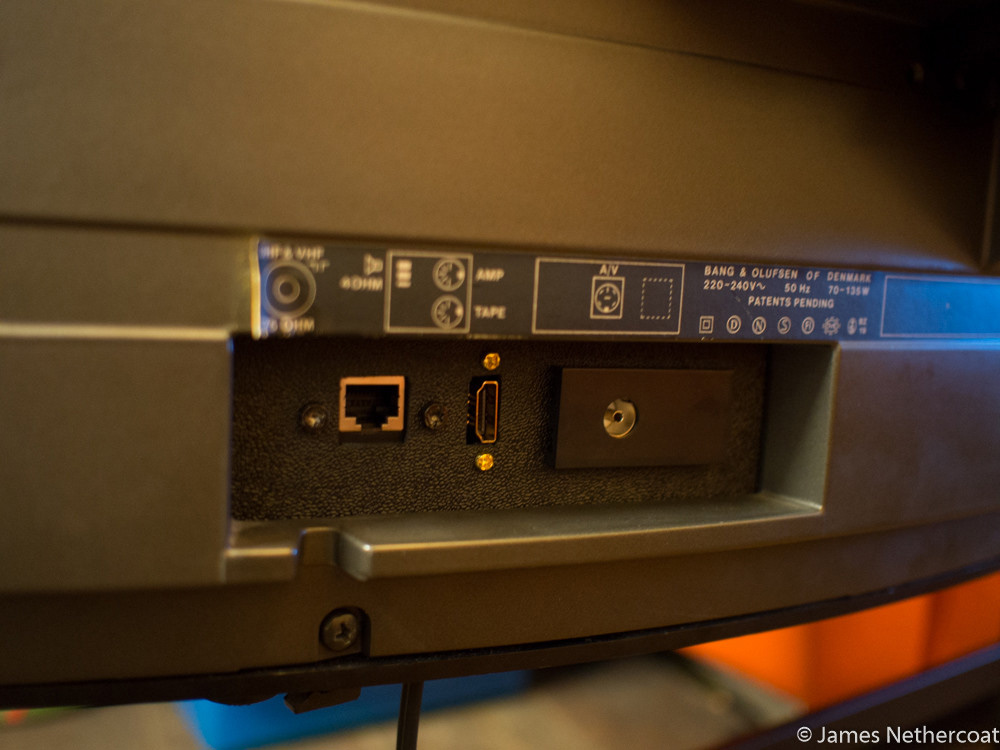
As you may have figured out, the ports for the motherboard aren't going to be accessible from the outside as the screen VGA cables all need to be routed internally. So i purchased a few small extender type things from your favourite auction site and made a small panel for the back. I have put a coaxial in (for the terrestrial TV tuner), an RJ45 network cable in and an HDMI out as eventually i want to be able to output this to a projector screen.
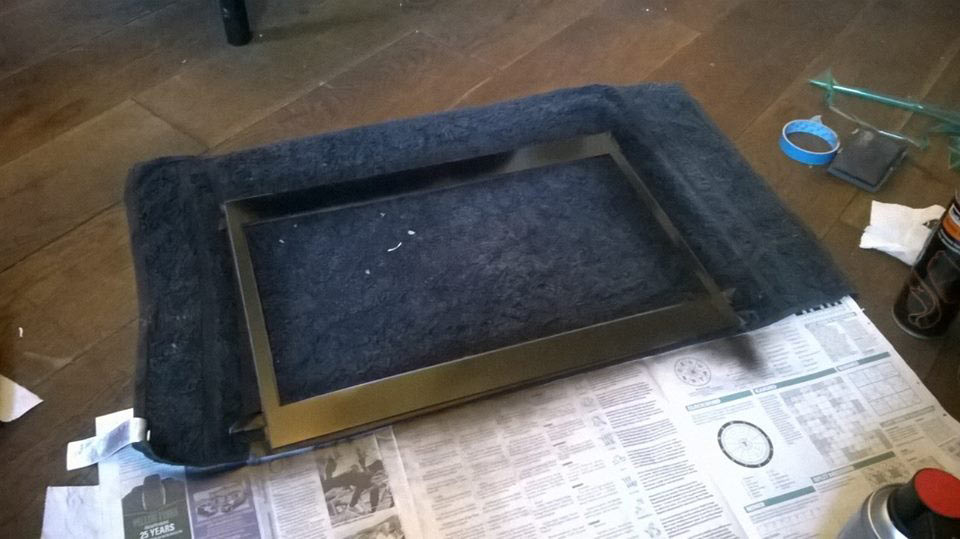
Although I have outlined all the hardware used above, at this point I had only figured out the basic setup with mobo and PSU, but was struggling to figure out what to do about a screen. First of all i wanted to go for a 4:3 format screen which would match the CRT that was taken out however it became quickly apparent that finding a 4:3 ratio screen that was 22" in diameter would be impossible. The only one i could find was �3000 and was designed to be used in marine applications. Back to the drawing board and I found a 23" LED IPS screen that amazingly, fit the housing by about 5mm either side.
This meant that I had to create some kind of bezel to blank off the top and bottom section of the screen, so I designed a bezel on autocad that could be cut out by a CNC cutter to give a top quality finish.
I used some clear perspex for this and then painted the back of it black so the side that was showing would have a glossy mirror finish. I also painted my living room floor at the same time...
I also made these panels for underneath the bezel to just keep it looking nice and tidy, which I later wrapped in wood grain vinyl to match the rest of the TV.
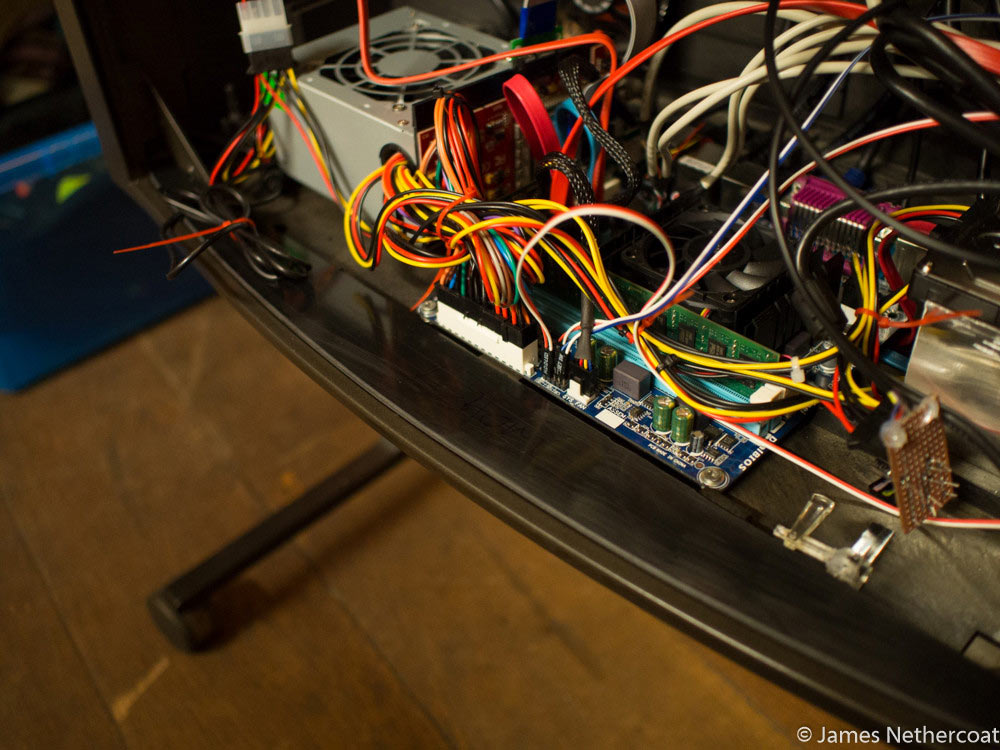
Here is a shot of the inside of the TV with the screen mounted in place and all the cables tidied up. I used some super strong 3M automotive trim tape to secure the monitor in place and so far after 6 months it hasn't fallen out yet! If you look between the mobo and PSU, you can just spot where I slotted in the USB TV tuner too.
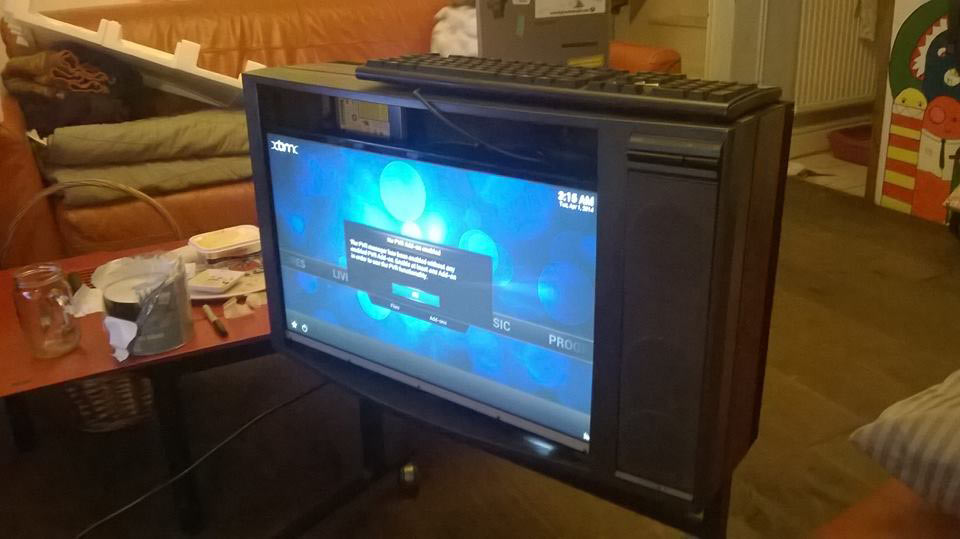
And here is the completed TV in it's hidey-hole.
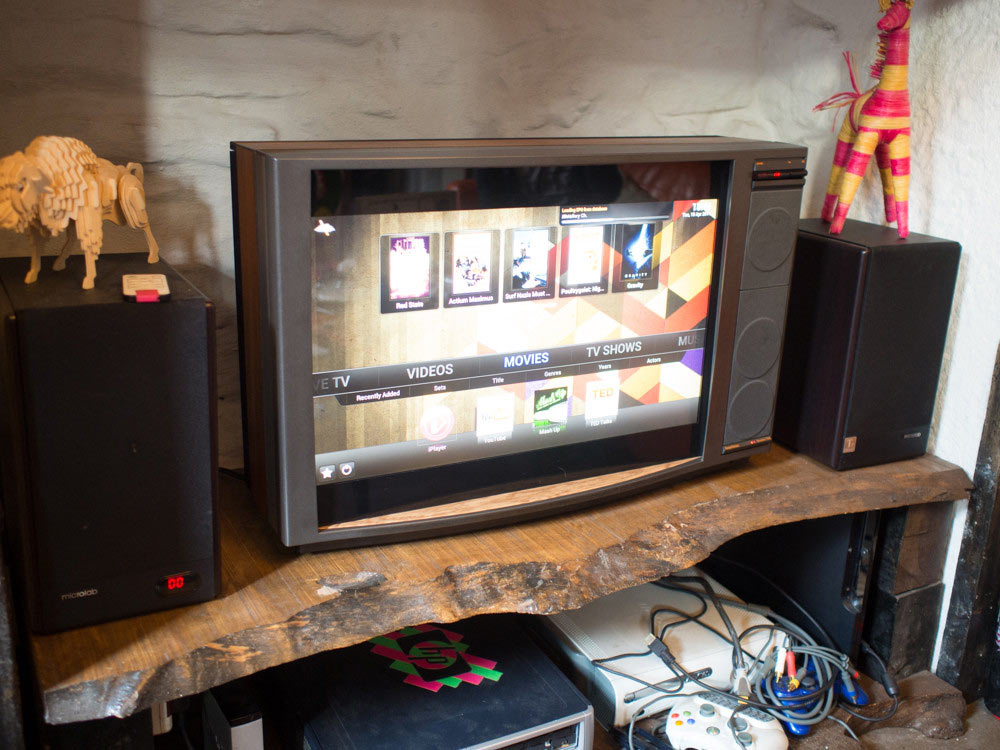
A bit on the OS - I used OpenELEC for this project as it is super easy to set up, it updates itself, there is tonnes of support and it boots up directly to XBMC with no issues. I have been using this as my only TV for the past few months and it hasn't missed a beat. Here is a quick video demonstration I did, please excuse my broad Yorkshire accent!

 |
 |
 |
Quick Links
Mailing Lists:
Mini-ITX Store
Projects:
Show Random
Accordion-ITX
Aircraft Carrier
Ambulator 1
AMD Case
Ammo Box
Ammo Tux
AmmoLAN
amPC
Animal SNES
Atari 800 ITX
Attache Server
Aunt Hagar's Mini-ITX
Bantam PC
BBC ITX B
Bender PC
Biscuit Tin PC
Blue Plate
BlueBox
BMW PC
Borg Appliance
Briefcase PC
Bubbacomp
C1541 Disk Drive
C64 @ 933MHz
CardboardCube
CAUV 2008
CBM ITX-64
Coelacanth-PC
Cool Cube
Deco Box
Devilcat
DOS Head Unit
Dreamcast PC
E.T.PC
Eden VAX
EdenStation IPX
Encyclomedia
Falcon-ITX
Florian
Frame
FS-RouterSwitch
G4 Cube PC
GasCan PC
Gingerbread
Gramaphone-ITX-HD
GTA-PC
Guitar PC
Guitar Workstation
Gumball PC
Hirschmann
HTPC
HTPC2
Humidor 64
Humidor CL
Humidor II
Humidor M
Humidor PC
Humidor V
I.C.E. Unit
i64XBOX
i-EPIA
iGrill
ITX Helmet
ITX TV
ITX-Laptop
Jeannie
Jukebox ITX
KiSA 444
K'nex ITX
Leela PC
Lego 0933 PC
Legobox
Log Cabin PC
Lunchbox PC
Mac-ITX
Manga Doll
Mantle Radio
Mediabox
Mega-ITX
Micro TV
Mini Falcon
Mini Mesh Box
Mini-Cluster
Mobile-BlackBox
Moo Cow Moo
Mr OMNI
NAS4Free
NESPC
OpenELEC
Osh Kosh
Pet ITX
Pictureframe PC
Playstation 2 PC
Playstation PC
Project NFF
PSU PC
Quiet Cubid
R2D2PC
Racing The Light
RadioSphere
Restomod TV
Robotica 2003
Rundfunker
SaturnPC
S-CUBE
SEGA-ITX
SpaceCase
SpacePanel
Spartan Bluebird
Spider Case
Supra-Server
Teddybear
Telefunken 2003
TERA-ITX
The Clock
ToAsTOr
Tortoise Beetle
Tux Server
Underwood No.5
Waffle Iron PC
Windows XP Box
Wraith SE/30
XBMC-ION